
Yes...really!
The BLUF: These are great, best $4.50 you'll ever spend!
Buy them [HERE]
Buy them [HERE]
The card-driven mechanics are not a mechanical simulation, so forget the variations of planes and hardware. BUT, they may be seen as a simulation of the balance Airmen make between:
- decisions within their control using the resources at hand,
- fleeting opportunities seen as a risk worth taking,
- and enemy activity that "gets a vote".
In that sense, they are actually closer to a simulation than a lot of other games that claim to be. Interestingly, this game does not.
If you need more convincing for your hard-earned cash, on to the more detailed review...
I got more confidence after watching the intro video to T. Jenson's "Missile Threat" which I found accidentally on another blog where they were using it for the Falklands. It clearly had some clean, straightforward mechanics that are a nice balance of abstraction and realism. So I was hopeful about "Air Strike..." and figured what the heck, it is only $4.50!
The card mechanics orient around the following limits:
- 4 card hand per plane, you must play two a turn.
- Number cards are movement, turns, and [with optional rule] cannon attacks; face cards are moves and missile attacks.
- you can defeat enemy attacks by playing a higher card [thus, if you are faced with many attacks, you may run out of cards, or high cards, and take hits].
- if you run out of cards, you lose your turn but draw extra cards next turn.
Aside from that, just a few nuances in play mechanics.
I set up a simple fight, two Russky Su-27 [red, left] v. two F-16s [blue, right]. I put out their card hands, which *seem to* favor the Reds, who have more high cards.

Blue Turn 1. They start by playing out some weak number cards hoping for better replacements. Or they're just obeying the ROE?

Red Turn 1. No worries about the ROE here! Reds advance [number cards] then fired a missile each [face cards - higher the card the greater the "threat level" of the attack, which I interpret as the quality of the lock-on]. The missiles move fast but fixed distances each turn when the firing plane activates [creats tension against the variable move opportunities of the aircraft - nice!].

Blue Turn 2. Hands are still a bit weak [no face cards for missile attacks - they can't get a lock-on...they must be getting jammed!] so they turn away, playing for time and preparing to evade missiles!

Red Turn 2. They have hot cards, and great lock-ons! They again fire missiles [Jack and Ace] as their previous missiles track and close in. cue menacing voice..."I have you now, imperialist running dog!"

Blue Turn 3. BUT! USAF training kicks in, and both planes dodge at point-blank range, running past and along side the incoming missiles, finishing far to their left to get out of the missile tracking arcs. I marked the missiles tracking Blue 1 red and those tracking Blue 2 [wingman] green.

Above, both Red missiles lose Blue 1 [he passed their tracking area, so they turn towards him and lose their lock]...

...and are removed.
Red Turn 3. Red 1 turns and advances, but can't fire a missile or use his cannon. He used the 8 for the turn and the 5 for distance, not wanting to get too close and perhaps be attacked in return.

Red 2 starts his turn, both his missiles track but the foremost missile loses the target...

...which is behind the tracking arc...
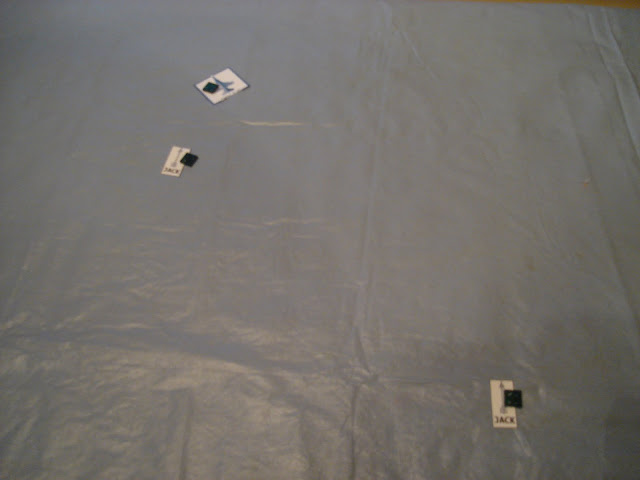
...so is removed. The second missile has closed in, however!

Red 2 then moves, using two number cards to turn then move 2" forward. I'm leery about getting too close...this may or may not be a wise tactic, hard to tell at this point.

Blue Turn 4. Blue 1 turns and moves a little. Blue 2 just moves a bit. Basically, they just didn't have the cards to lock-on and attack with missiles, so they took some short moves and ditched low cards looking to improve their options, i.e. their hands of cards.

Red Turn 4. Red 1 advances 3", locks-on with an Ace and fires a missile - Blue 1 can't defeat it with a higher card so it hits!

Damage in Air Strike is pretty simple - take two hits and you're shot down. There's a rule for matching missile hits by threat level, but I ditched it as a bit odd and complicated. One of the few rules that made no sense to me.
Red 2 turns and plays an Ace lock-on also! Missile fires off and can't be defeated, so Blue 1 is down! Bottom of his class at Top Gun?

Blue Turn 5. Blue 2 is out for revenge - and he has the cards! Unfortunately, he is just a hair out of 8" and missile range, so he'll have to turn and close in for a real melee!

He plays 4 to turn and 10 for distance, and is all over Red 2.

Red Turn 5. Red 1 has weak cards so just turns around tight as possible. Red 2 turns with a '5', locks-on with a King and launches. But Blue 2 is too slick - he dodges with an Ace! would've liked that card for a missile lock but...outnumbered and no Hits on either Russkie means he has to bide his time...

Blue Turn 6. Blue 2 brakes hard right, locks-on with a King, launches and can't be beat [Red 2 has no Ace to beat the King lock-on, so can't even play his King]. A hit is scored - first blood!

Red Turn 6. Red 1 floors it past Blue 2.

Red 2 fires his cannon at a 9, but Blue 2 evades playing a Queen. Red 2 then passes Blue 2 and Red 1.

Blue Turn 7. Blue 1 hard turns and is on both Red tails!

Red Turn 7. Red 1 blasts forward out of dodge and then hard turns left.

Red 2 then gets past Red 1 and also turns hard left. My thinking is that they don't want to be too close, and they don't want Blue 2 on their tail. It's my first game, I'm uncertain what's best...

Blue Turn 8. A short advance against Red 1 and a 6 cannon attack is defeated by Red 1 playing a King and evading the hail of shells.

Red Turn 8. Red 1 turns hard left, fires a 6 cannon which is defeated by Blue 2's 7 evade. you can feel the micro-seconds ticking along between the actions and interactions of this dogfight!

Red 2 then turns, locks on with an Ace and fires a missile.
Aside from that, just a few nuances in play mechanics.
I set up a simple fight, two Russky Su-27 [red, left] v. two F-16s [blue, right]. I put out their card hands, which *seem to* favor the Reds, who have more high cards.

Blue Turn 1. They start by playing out some weak number cards hoping for better replacements. Or they're just obeying the ROE?

Red Turn 1. No worries about the ROE here! Reds advance [number cards] then fired a missile each [face cards - higher the card the greater the "threat level" of the attack, which I interpret as the quality of the lock-on]. The missiles move fast but fixed distances each turn when the firing plane activates [creats tension against the variable move opportunities of the aircraft - nice!].
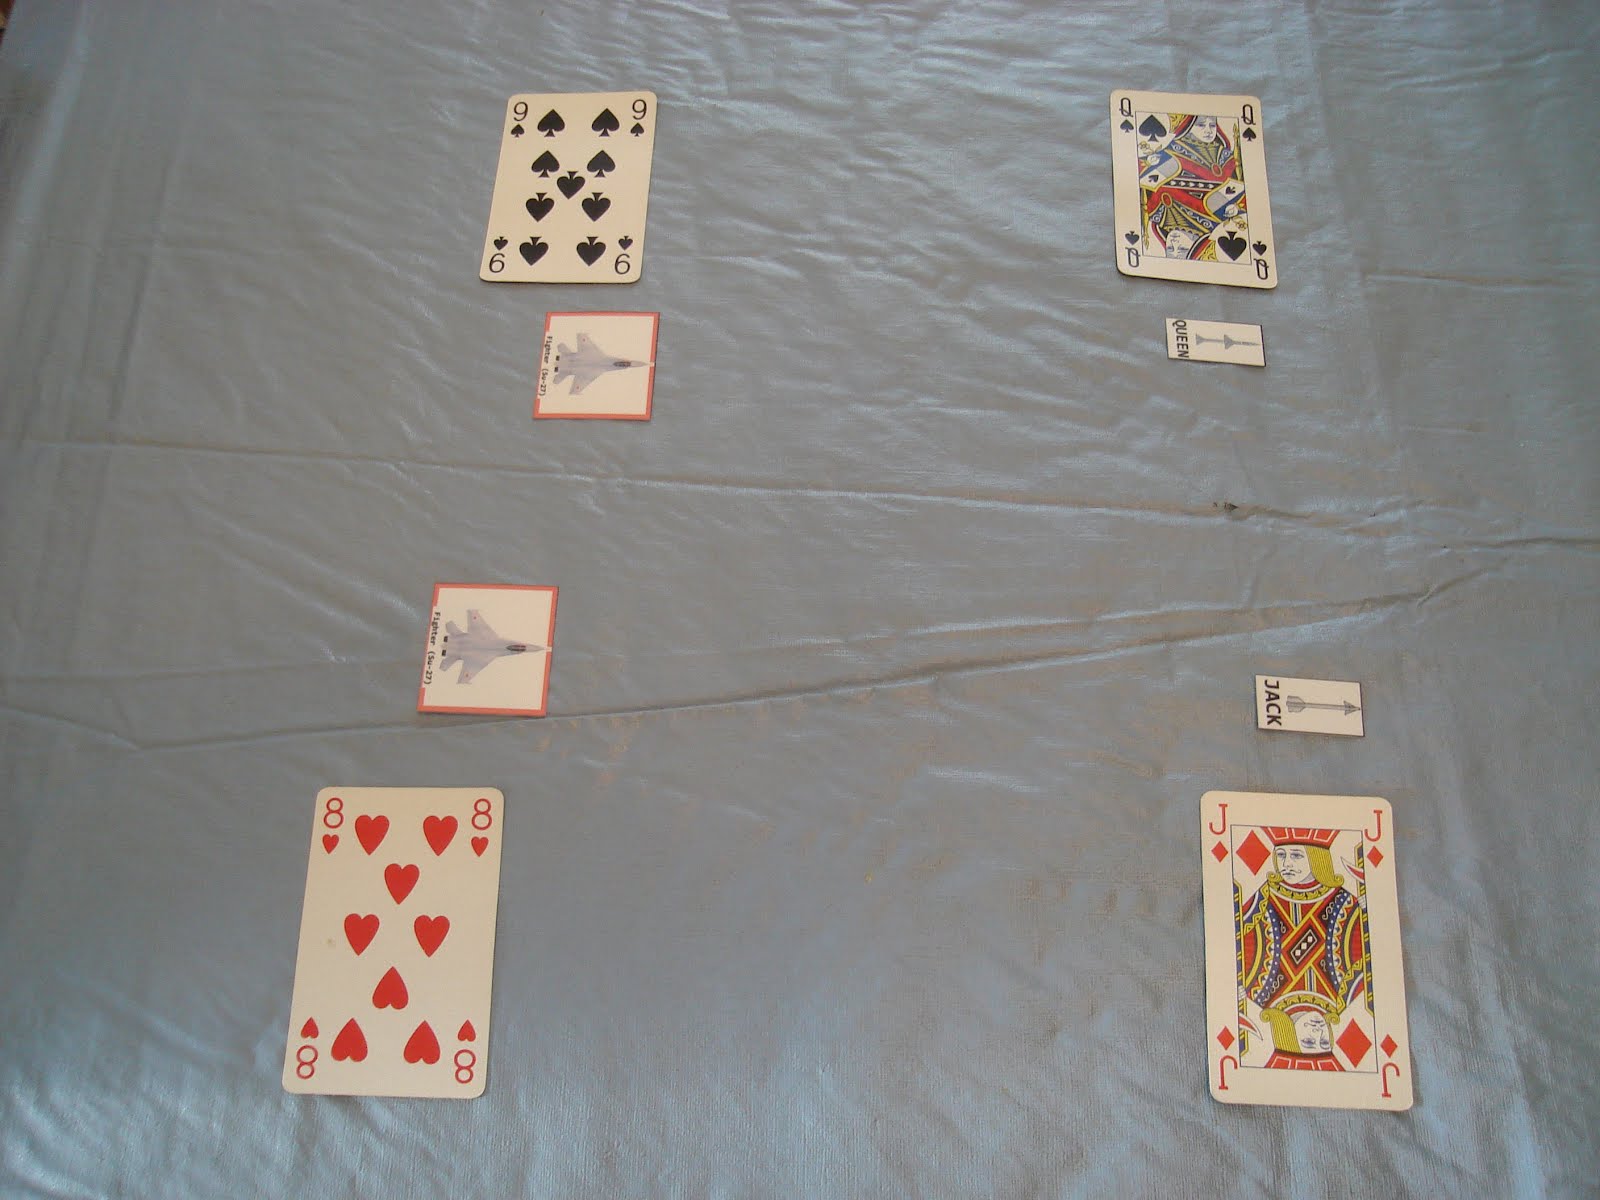
Blue Turn 2. Hands are still a bit weak [no face cards for missile attacks - they can't get a lock-on...they must be getting jammed!] so they turn away, playing for time and preparing to evade missiles!

Red Turn 2. They have hot cards, and great lock-ons! They again fire missiles [Jack and Ace] as their previous missiles track and close in. cue menacing voice..."I have you now, imperialist running dog!"

Blue Turn 3. BUT! USAF training kicks in, and both planes dodge at point-blank range, running past and along side the incoming missiles, finishing far to their left to get out of the missile tracking arcs. I marked the missiles tracking Blue 1 red and those tracking Blue 2 [wingman] green.

Above, both Red missiles lose Blue 1 [he passed their tracking area, so they turn towards him and lose their lock]...

...and are removed.
Red Turn 3. Red 1 turns and advances, but can't fire a missile or use his cannon. He used the 8 for the turn and the 5 for distance, not wanting to get too close and perhaps be attacked in return.

Red 2 starts his turn, both his missiles track but the foremost missile loses the target...

...which is behind the tracking arc...

...so is removed. The second missile has closed in, however!

Red 2 then moves, using two number cards to turn then move 2" forward. I'm leery about getting too close...this may or may not be a wise tactic, hard to tell at this point.

Blue Turn 4. Blue 1 turns and moves a little. Blue 2 just moves a bit. Basically, they just didn't have the cards to lock-on and attack with missiles, so they took some short moves and ditched low cards looking to improve their options, i.e. their hands of cards.

Red Turn 4. Red 1 advances 3", locks-on with an Ace and fires a missile - Blue 1 can't defeat it with a higher card so it hits!

Damage in Air Strike is pretty simple - take two hits and you're shot down. There's a rule for matching missile hits by threat level, but I ditched it as a bit odd and complicated. One of the few rules that made no sense to me.
Red 2 turns and plays an Ace lock-on also! Missile fires off and can't be defeated, so Blue 1 is down! Bottom of his class at Top Gun?

Blue Turn 5. Blue 2 is out for revenge - and he has the cards! Unfortunately, he is just a hair out of 8" and missile range, so he'll have to turn and close in for a real melee!

He plays 4 to turn and 10 for distance, and is all over Red 2.

Red Turn 5. Red 1 has weak cards so just turns around tight as possible. Red 2 turns with a '5', locks-on with a King and launches. But Blue 2 is too slick - he dodges with an Ace! would've liked that card for a missile lock but...outnumbered and no Hits on either Russkie means he has to bide his time...

Blue Turn 6. Blue 2 brakes hard right, locks-on with a King, launches and can't be beat [Red 2 has no Ace to beat the King lock-on, so can't even play his King]. A hit is scored - first blood!

Red Turn 6. Red 1 floors it past Blue 2.

Red 2 fires his cannon at a 9, but Blue 2 evades playing a Queen. Red 2 then passes Blue 2 and Red 1.

Blue Turn 7. Blue 1 hard turns and is on both Red tails!

Red Turn 7. Red 1 blasts forward out of dodge and then hard turns left.

Red 2 then gets past Red 1 and also turns hard left. My thinking is that they don't want to be too close, and they don't want Blue 2 on their tail. It's my first game, I'm uncertain what's best...

Blue Turn 8. A short advance against Red 1 and a 6 cannon attack is defeated by Red 1 playing a King and evading the hail of shells.

Red Turn 8. Red 1 turns hard left, fires a 6 cannon which is defeated by Blue 2's 7 evade. you can feel the micro-seconds ticking along between the actions and interactions of this dogfight!

Red 2 then turns, locks on with an Ace and fires a missile.
Blue 9. Blue 2 locks-on with a Jack and fires, to finish off Red 2! After all, he can't have a second Ace up his sleeve, can he?? He then full thrusts with a 10 and cuts within the Red missile's tracking capabilities evading it...but it was very very close!

Red 9. Red 1 is short of cards, and plays a low move card. Red 2 turns hard right...

...but has nothing to avoid being struck by the missile as he can't get out of its tracking arc or defeat it with a Queen or better.

So on Blue Turn 9, it's "Buh-bye Red 2!" Blue 2 then turns hard left.

Red Turn 9 sees Red 1 go for some distance, using a Jack for 10" of forward burn.

Distance has lengthened out of either missile or cannon range. Blue has two face cards but Red has one Ace! Shhh, don't tell...

Blue Turn 10. He turns hard left and locks-on with his Queen and launches.

Red 10. With no fear, he hard turns with two cards for 180.


Red 9. Red 1 is short of cards, and plays a low move card. Red 2 turns hard right...

...but has nothing to avoid being struck by the missile as he can't get out of its tracking arc or defeat it with a Queen or better.

So on Blue Turn 9, it's "Buh-bye Red 2!" Blue 2 then turns hard left.

Red Turn 9 sees Red 1 go for some distance, using a Jack for 10" of forward burn.

Distance has lengthened out of either missile or cannon range. Blue has two face cards but Red has one Ace! Shhh, don't tell...

Blue Turn 10. He turns hard left and locks-on with his Queen and launches.

Red 10. With no fear, he hard turns with two cards for 180.

Blue Turn 11. The Queen lock-on is defeated by the Ace Red 1 had up his sleeve!

Blue then moves up and locks-on with his Jack, getting a hit

Blue then moves up and locks-on with his Jack, getting a hit
[Red has zero cards at this point, anyway, so something to be said for pacing yourself and/or pushing your opponent to go all-out to defend himself, spending cards in the process].

Red 11. Fate has turned against him - he draws 3 cards and should lose his turn as he had no cards left to play [clearly, he was regaining his senses or lost sight of Blue]. However, I forgot this and Red moved 2 and fired his cannon for a 6, best card he had. This is defeated by Blue's 10 easily.

Blue Turn 12. Blue turns with his 2 and...

...has Red in his sights. however, I think I erred in drawing two cards first - I was interrupted by the family at some point and this may have been it.

In any event, whether I skipped a turn with the pics, or not...

...Blue has a 7 which smokes Red since he can't beat the card with a higher card - his 7 is only equal.

Dosvedanya Comeraden!
Whew, that was a pretty intense little dogfight. Between paging thru the rules, playing both sides and figuring out what to try and do [plus an interruption or two], I am spent!
This is one of the most interesting games I've run into in a long time. The card mechanics aren't complicated, but it isn't easy figuring out how best to plan your actions when you don't know what cards the other guy has up his sleeve! It's amazing how much you get used to that "I know what's happening" vibe with miniatures [I realize lots of other games have concealed possibilities]. A lot depends on how your opponent reacts and what cards he has, so the game is much less predictable than a typical miniatures game - this captures the wild, fast-moving possibilities of air-air combat, or air-ship-ground combat, for that matter!
Interestingly, the card mechanics evade the limits of the fixed-time turn. The fixed-time turn is where each turn represents a fixed interval with speed limits, firing limits, reaction limits, built around the time the turn represents.
Interestingly, in fast-moving or intense periods of human activity, training and reaction times are so disparate that a fixed time turn just doesn't work. It often necessitate a mechanic to try and splice it into reactive sub-phases or partial turns where players may react and change their plotted orders. This feels more realistic and gives tempo to reactions in a game about fast-moving gear, e.g. Star Fleet Battles [32 sub-phases?] or Car Wars [10 sub phases? can't remember].
Here, the turn is best perceived as of flexible length, and based upon reaction times of pilots which of course are not identical. For example, if both players play low cards, then the turn may be seen as shorter with more intense activity, e.g. attacks or maneuvers. If both players have higher cards, then the turn may be seen as longer, with more movement and fewer opportunities for actions. When players play a mix of cards, there's an increasing variable between movement and activity.
Ergo, the cards should be seen as representing opportunities for decision points to change position relative to other fighters; low cards can represent a quick decision to act [turn or shoot], while high cards are useful to push the speed up and either close in or get away.
The interaction and availability of various decision points and opportunities [cards] and how the player uses them determines who wins the game.
Critical point: the cards played for movement do NOT represent speed / velocity! They represent the interval of movement between opportunities for OTHER types of activity, e.g. lock-on and launch a missile, shoot a cannon, maneuver / turn.
Interestingly, I found high cards less useful at times when I wanted to dogfight - you want the low cards to stay close, turn tight, etc, then lock-on with a missile or fire off the cannon.
Altho missiles can be evaded at longer ranges [easier reaction for the target] close in they are better than cannon fire since they have a wider arc of fire [180 front v. straight ahead, this may be way off...perhaps it should be a 90 arc].
Only thing I don't like is that you can decline to move at all, just rotate on the spot up to 180 - this would take two cards and your whole move, so perhaps is not entirely misplaced [representing an Immelman or other extreme maneuver?]. Still, it can be done over and over with no chance of failure and no repercussions.
It may be that the scale allows the plane counter itself to be the size of the tightest turn possible...but I still don't like it since it gives the planes a turret sort of feel. Also, the forward momentum of the planes creates tension with the maneuvers and prevents the players from twirling around in place and just shooting...like a turret! Perhaps a tweak needed here.
Overall, I think this game is amazing - I would never have thought of these mechanics, and I wonder if the designer stumbled upon the concept or stole it from someone else [how many original mechanics are there in this hobby, anyway??]. Whatever, in 37 years of wargaming, I haven't seen it before.
The game has some obvious limits - there is no difference in plane capabilities or in weapon capabilities. Neither pilot is better trained than the other. The technical aspect of the gear has been completely set aside in favor of the player choices and the cards that fate brings. This gives the game a fast, risky feel that is great.
Playing two on two and both sides, I feel like I saw a lot of action and yet am just scratching the surface of a brilliant little game. I can hardly wait to try it with some pals or my family, even!

Red 11. Fate has turned against him - he draws 3 cards and should lose his turn as he had no cards left to play [clearly, he was regaining his senses or lost sight of Blue]. However, I forgot this and Red moved 2 and fired his cannon for a 6, best card he had. This is defeated by Blue's 10 easily.

Blue Turn 12. Blue turns with his 2 and...

...has Red in his sights. however, I think I erred in drawing two cards first - I was interrupted by the family at some point and this may have been it.

In any event, whether I skipped a turn with the pics, or not...

...Blue has a 7 which smokes Red since he can't beat the card with a higher card - his 7 is only equal.

Dosvedanya Comeraden!
Whew, that was a pretty intense little dogfight. Between paging thru the rules, playing both sides and figuring out what to try and do [plus an interruption or two], I am spent!
This is one of the most interesting games I've run into in a long time. The card mechanics aren't complicated, but it isn't easy figuring out how best to plan your actions when you don't know what cards the other guy has up his sleeve! It's amazing how much you get used to that "I know what's happening" vibe with miniatures [I realize lots of other games have concealed possibilities]. A lot depends on how your opponent reacts and what cards he has, so the game is much less predictable than a typical miniatures game - this captures the wild, fast-moving possibilities of air-air combat, or air-ship-ground combat, for that matter!
Interestingly, the card mechanics evade the limits of the fixed-time turn. The fixed-time turn is where each turn represents a fixed interval with speed limits, firing limits, reaction limits, built around the time the turn represents.
Interestingly, in fast-moving or intense periods of human activity, training and reaction times are so disparate that a fixed time turn just doesn't work. It often necessitate a mechanic to try and splice it into reactive sub-phases or partial turns where players may react and change their plotted orders. This feels more realistic and gives tempo to reactions in a game about fast-moving gear, e.g. Star Fleet Battles [32 sub-phases?] or Car Wars [10 sub phases? can't remember].
Here, the turn is best perceived as of flexible length, and based upon reaction times of pilots which of course are not identical. For example, if both players play low cards, then the turn may be seen as shorter with more intense activity, e.g. attacks or maneuvers. If both players have higher cards, then the turn may be seen as longer, with more movement and fewer opportunities for actions. When players play a mix of cards, there's an increasing variable between movement and activity.
Ergo, the cards should be seen as representing opportunities for decision points to change position relative to other fighters; low cards can represent a quick decision to act [turn or shoot], while high cards are useful to push the speed up and either close in or get away.
The interaction and availability of various decision points and opportunities [cards] and how the player uses them determines who wins the game.
Critical point: the cards played for movement do NOT represent speed / velocity! They represent the interval of movement between opportunities for OTHER types of activity, e.g. lock-on and launch a missile, shoot a cannon, maneuver / turn.
Interestingly, I found high cards less useful at times when I wanted to dogfight - you want the low cards to stay close, turn tight, etc, then lock-on with a missile or fire off the cannon.
Altho missiles can be evaded at longer ranges [easier reaction for the target] close in they are better than cannon fire since they have a wider arc of fire [180 front v. straight ahead, this may be way off...perhaps it should be a 90 arc].
Only thing I don't like is that you can decline to move at all, just rotate on the spot up to 180 - this would take two cards and your whole move, so perhaps is not entirely misplaced [representing an Immelman or other extreme maneuver?]. Still, it can be done over and over with no chance of failure and no repercussions.
It may be that the scale allows the plane counter itself to be the size of the tightest turn possible...but I still don't like it since it gives the planes a turret sort of feel. Also, the forward momentum of the planes creates tension with the maneuvers and prevents the players from twirling around in place and just shooting...like a turret! Perhaps a tweak needed here.
Overall, I think this game is amazing - I would never have thought of these mechanics, and I wonder if the designer stumbled upon the concept or stole it from someone else [how many original mechanics are there in this hobby, anyway??]. Whatever, in 37 years of wargaming, I haven't seen it before.
The game has some obvious limits - there is no difference in plane capabilities or in weapon capabilities. Neither pilot is better trained than the other. The technical aspect of the gear has been completely set aside in favor of the player choices and the cards that fate brings. This gives the game a fast, risky feel that is great.
Playing two on two and both sides, I feel like I saw a lot of action and yet am just scratching the surface of a brilliant little game. I can hardly wait to try it with some pals or my family, even!


