Thursday, June 21, 2018

Portable Naval Wargame Pre-dreadnought Playtest 3

After some to-ing and fro-ing with Bob Cordery, and a bunch of research including closely reading his Modern Land Rules, I decided to focus on ranging in as a mechanic that adds "feel" and more importantly affects player decisions / tactics on the table. The historical reasons being:

  1. Acquiring a target was key to gunnery hits.
  2. The longer you fired upon a target your better chance to get the correct range and start getting hits.
  3. Ships purposefully maintained relative course and speed to increase their chance of getting hits, or altered course and speed to reduce the enemy's chance, i.e. chasing the splashes.
  4. Close range combines the flat trajectory zone of the gun, the capabilities of the sights, quality of the crew / gun, and good sighting during sea conditions.
  5. Targets that evade, turn, have multiple ships firing upon it, or are obscured by smoke / fog / mist are harder to hit.
  6. Ranges of 2000-4000 yards were about the best one could manage depending on sea state as guns were still mostly under local control and firing from a rolling ship.
This became the following rule:
"To roll the gun dice for damage, a target must first be ranged-in, i.e. acquired. The base roll to acquire a ship target is a 4+ on d6, modified as follows:

+1 for Close Range [3 hexes or less]
+1 for firing at the same target as last turn
-1 if target is Evading, obscured, or multiple ships are firing upon it
+1 / -1 for Excellent or Poor crew.

The goal being to intro target acquisition as something that impacts TACTICS as well as gives period feel.

I also changed the facing of ships to facing directly along a hex spine - it just works easier and allows gentle turns with no rules issues.

So, how did this all work out?

Well, I used the latest version of the Portable Naval Wargame, right from Bob C's draft, which he kindly sent me and I kindly read it and offered some suggestions to make the text clearer, etc. So this is the latest PNW.

One big change is that there are Primary and Secondary batteries, with different dice and ranges. There is a net increase in firing dice, which has been somewhat offset with a net increase in Flotation Points [representing both armor and displacement].

The scenario is very similar to last time. In this alternative Battle of Manila Bay, the Spanish have mined the entrance and stand guard out in the bay after the successful arrival of Adm Camara's Flying Squadron, which includes the Battleship Pelayo and the Armored Cruiser Emperador Carlos V, with 12" and 11" main guns respectively. They have 6 mine markers numbered 1-6, and 1-3 actually have mines which attack a passing ship at the marked value. Meanwhile, the Spanish ships have the possibility of being caught unready by the attack, so have two markers picked from the numbered 1-6 available. They are turned over turn 1 and show what turn the Spanish can get under way. 

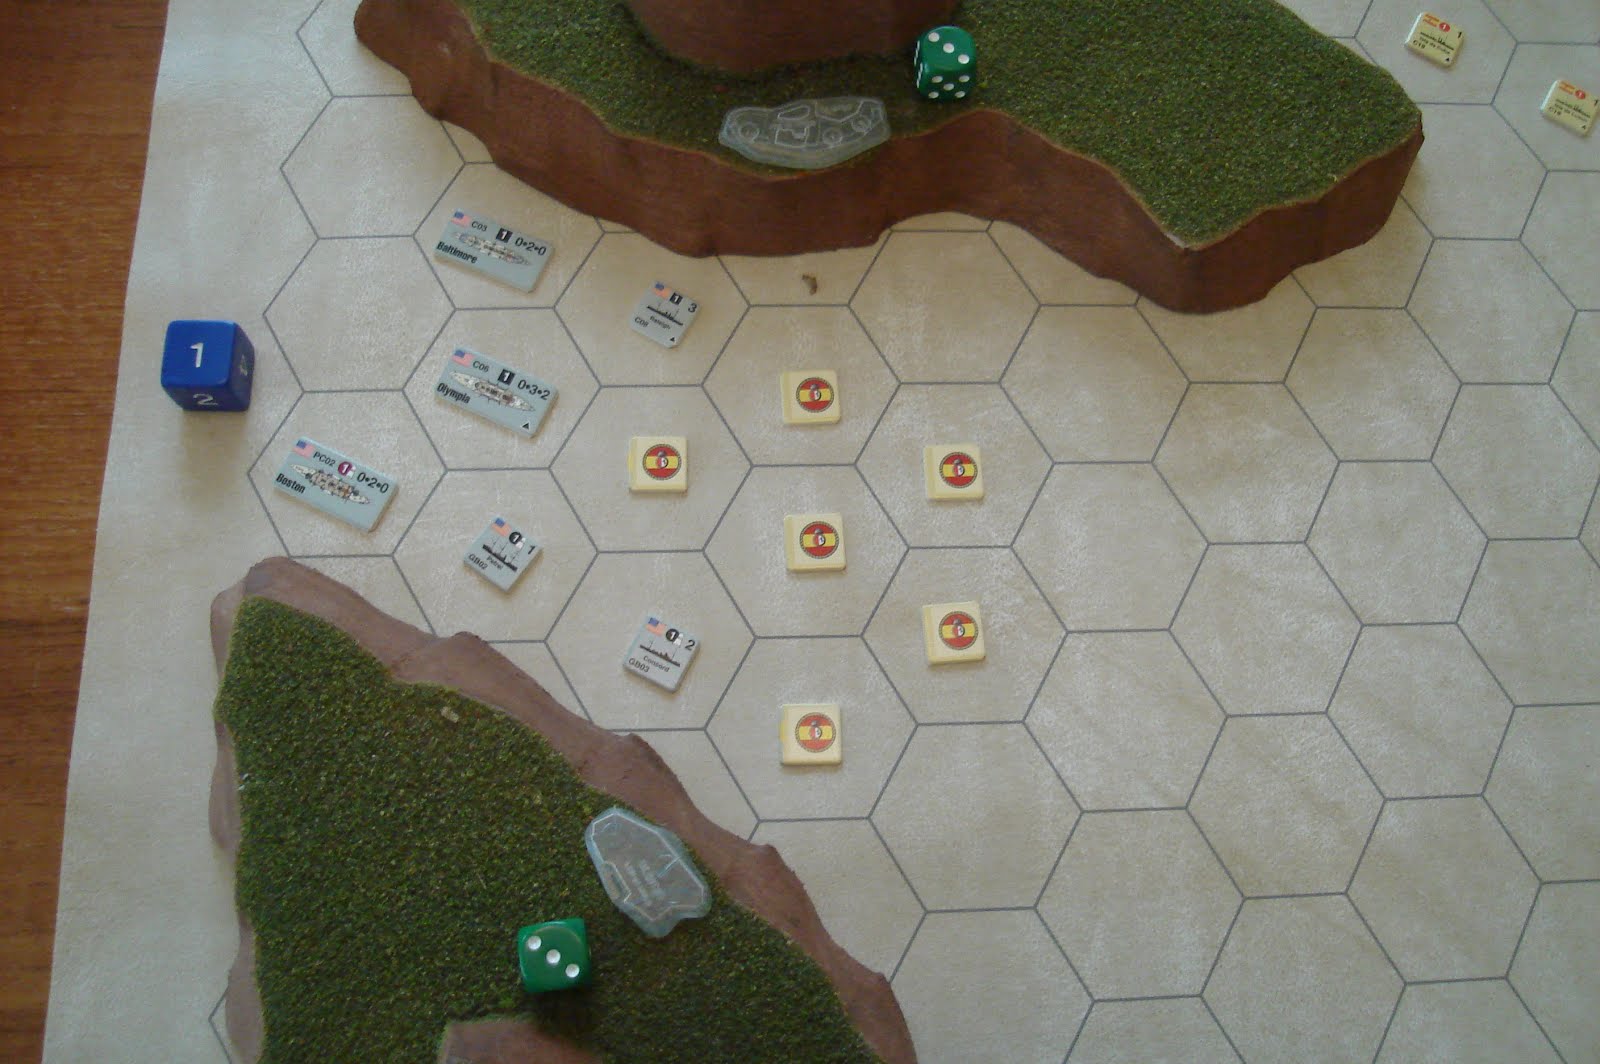
Below, the US Fleet prepares to enter from left. Boston, Baltimore, Olympia and Raleigh [using an Atlanta counter so it will be full-sized]. To the right, the Spanish squadron is getting under way in two divisions, the right with Pelayo and Emperador Carlos V, a battleship and armored cruiser, and the left with Castilla and Reina Cristina, both unprotected Cruisers.

The Stats are something like: 
Spanish Flotation Points = 45, US Flotation Points = 43
Spanish Batteries = 34 dice, US Batteries = 41
So parity on hulls, but the US is 50% faster, and has an edge on gun dice. Plus there is the tradition I'm building of Amazing Yankee Dice!

Turn 1 Movement [note the blue d12 is wrong!]. There is no gunnery [everyone is well out of range] and the US loses the move roll so moves first. They elect to stay North in the channel, and the first hex is clear [the '5' doesn't count] while the second does have mines, but only attack at a 1 on a d6. Naturally, the Boston rolls a '1' while the Baltimore has a close shave with a '2'! Having been successfully attacked by the Spanish mine, damage is rolled for and the 4=1 Hit. The Spanish reveal no delay to Pelayo's division, but the Unprotected Cruisers are delayed until Turn 2.


Turn 2 Movement. Again, no gunnery. The US again loses so moves first. The Squadron eases thru the North channel and turns South.Olympia manages to pass thru, but the Raleigh also rolls a '1', and fortunately the Spanish mine is a dud [rolling 1-3 misses]. The Spanish edge closer at their 2-hex movement. All the US ships except Raleigh are 3-hex [turns out this is an error - the Boston was the slow one, oops].


Turn 2 Gunnery, Turn 3 Movement. The big ES ships were in range and I forgot to roll for them. The Pelayo fails to range in [a continuous problem, it will turn out to be]. The Emp. Carlos manages to do so and acquires the leading Boston, and inflicts a Hit.


Turn 4 gunnery. The Pelayo again fails to acquire Boston, but the Emperador manages a hit. The USN fails to range in with anyone but Baltimore who puts a hit on Pelayo [14 more to go...]. I'm noting which ships is an acquired target on the log sheet.


Turn 4 Movement. The ES lose and move first, advancing a hex then turning. The USN pulls ahead to bring superior numbers against the lead Spanish ships.


Turn 5 Gunnery [*sigh* I should stop using a turn dice...]. Pelayo fails for the third time to acquire a target. Castilla is barely in range of Olympia, but also fails. Emperador Carlos gets 3 Hits with her main and 2 with her secondary batteries, trashing the Boston who now has to retreat from the battle and fight to stay afloat! 
In return, the Olympia quickly ranges in and inflicts a whopping 7 hits on Pelayo - holy moly! it should be noted that Olympia has rolled hot in every game I've played thus far. The Boston also ranges in, and adds 3 more. Baltimore then plasters Emperador Carlos with 7 hits, getting her well on the way to retreat or sinking in one fell swoop. Damn Yanquies!!


So halfway thru turn 5, we stand with Pelayo and Emperador both in trouble, with 11/15 and 7/12 Hits, and in return Boston has 8/10 and must retreat. But at this range and with this firepower, I'm uncertain how long these Spanish ships will be afloat! Now if it was the Olympia that was in trouble, this might be a better contest...


Turn 5 move. The US loses and turns the Boston away while the Olympia and Baltimore dog the Spanish. Raleigh moves up, and the Castilla and Reina Cristina close in hoping to sink her quickly and turn things around. The Pelayo and Emperador Carlos veer off but the distance is still close...too close.


Turn 6 West Gunnery is bloody. The Castilla quickly acquires the Raleigh and blasts her with 5 points of damage. The Reina fails to acquire by rolling miserably low and the Raligh returns with 7 points of damage to the Castilla, bringing her to the Critical Point.


Turn 6 East gunnery is brutal. The Spanish fail to range in while the Olympia contributes 7 Hits and sinks Pelayo. The Baltimore then hammers home 4 on Emperador Carlos, sinking her as well. Amazingly, the Spanish, once again, have been viciously out-rolled!


Turn 6 Moves. The Spanish lose and move first, advancing to block Raleigh from escaping.

Raleigh moves one up, then turns for 1 - I don't see any reason to use the quite detailed ramming rules, I don't think Raleigh should even have the option.

Olympia and Baltimore turn up to engage the remaining Spanish ships.


Turn 7 West Gunnery. Castilla puts in 3 Hits on Raleigh, which will cause her to retreat. Unfortunately, US gunnery is quite solid and gives 4 back, sinking her.

Turn 7 East Gunnery. Well, their luck didn't run out. Both ships acquire Reina Cristina, and put 11 Hits on her, easily sinking her - The Don is Down!!


Final Tally. Spanish lose all 4 ships sunk, including a battleship. The US has two protected cruisers retreating. This is largely due to bad dice rolling by the Spanish, and amazing dice rolling by the US! Still, I feel that gunnery is too deadly, overall.


Happy with the facing mechanic [ships now face spine, not hex side] and the ranging-in / target acquisition mechanic. Ships who haven't acquired a target or are out of range have a reason to be evasive while its better to repeat attempts to range in on the same ship. Short range is of course, easier to range in and get Hits.

Some things to work on:

  1. The lack of differentiation between ships means some flavor is lost - these are definitely fleet battle games for 1-2 squadrons per player, at least.
  2. Armor Rules would be nice! Even something as simple as -1 dice for light, -2 for medium and -3 dice for heavy armor.
  3. Gunnery is too powerful. Granted, this is a fight in a harbor, but the firepower to speed ratio is off - if both sides close with each other, in two turns you can close from out side of range to deadly close range, which makes me wonder how long a turn is, really?? 
  4. Secondary batteries seems unnecessary - the mechanic from the download version already allows for the broadside to get weaker with distance. And at 1-2 hexes the firepower of 8-10 dice results in 5-7 Hits on average - sinking ships in a turn or two depending on size. I will return to the original system from the downloads - you've one broadside that loses dice with distance. The only reason they might be useful is if there was a mechanic that allowed the Quick-Firing guns to fire first, before the big slow guns.
  5. Shoot-Move turn sequence drives me nuts! There doesn't seem to be any particular need for it, and Move-Shoot seems like a much more natural way to play a naval game.
  6. Ship Preservation Mentality Mechanic. There needs to be some reason for ships not to close into point blank range and blast each other to pieces in a couple of bloody turns. Something like a Morale or Tactics roll - the simple fact is that if both sides sink half a fleet, they should both lose. So maybe you get 1 point for forcing a ship to retreat and 2 points for sinking it, but you lose 2 points for having a ship retreat yourself, and 3 points for one of yours sunk [or 4 points]. It should be kept in mind that 
  7. Retreating should halve gunnery, or something [the crew's busy trying to keep the ship afloat]. Simplest would be to say it can't fire any more.

Portable "Naval Wargame: Predreadnoughts" is definitely a somewhat stylized and streamlined game. I think that it does need just a bit more mechanics put into it, and that they should be there strictly to shape a more historical mentality for the players. These additions should not add to the book keeping or complexity much, if at all possible.

Overall, I think the system is worth tinkering with, but I should definitely practice with a simple, open-sea scenario, perhaps with a little fog thrown in to make it interesting...perhaps a coast-line as well? We'll see.

Thursday, June 14, 2018

Pre-dreadnought Project, p.4: Painting 1:3000 Fleet

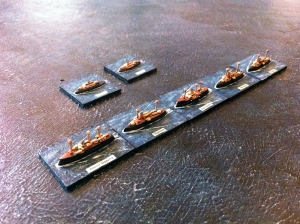
These fleets have more possible color schemes than the typical 
"variations on grey" of later periods
Related image

Well, I want to paint this stuff up quickly and be able to easily discern the squadrons from each other, so here's the scheme:


Clean and prep the pewter...white spray paint primer [they're tiny, need bright colors].

The following schemes to differentiate the Mediterranean squadrons, which are from War Times Journal and Fighting Fleets. I've tried to provide some pics so that one can see how the schemes look and decide if they have visual appeal.

Quick Thought:
It should be kept in mind that it is always possible to differentiate nationalities from one another by tonal variations, e.g. not all ochre is the same color. A darker ochre may ground a white ship better to the viewer, while a lighter ochre will help brighten up a black-hulled ship. As much of these details are unknown, I feel it is better to err on the side of artistry and easy of play than worry about the nitty gritty of possible tonal shades weathered by the Adriatic through a misty season! 

Also, paint was not nearly as sophisticated as today, and would show up with variation by manufacturer, be applied differently by different authorities, weather badly, and may very well not have a uniform standard conscientiously applied.

The purpose of the below pics is not just to provide some [possible] historical paint schemes, but also just to show what certain color schemes look like. This may help the artistically committed gamer decide on paint schemes where there is little evidence! Also, most of the images have links which may well provide a source for further ship images and information.
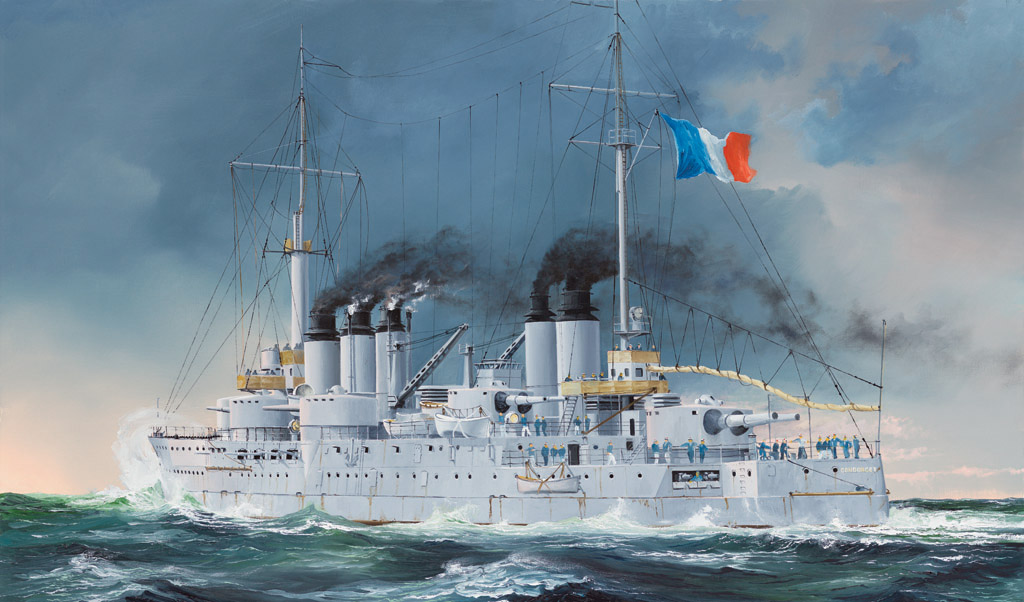
First a comparison image of a few different paint schemes:


Spain
Peacetime: Most black hull, white superstructure , ochre funnels.
Some light vessels had all white hulls & superstructure ochre funnels.
Wartime: No special wartime colors are known.
                - “FIGHTING FLEETS”: unknown [!?]
 
Peacetime: black hull, white superstructure & turrets , ochre funnels and masts. The black hull often had a narrow white band just below its upper edge, all the way around the ship. Sometimes (rarely, seen once on HMS Nile) the black was carried up onto the upperworks as high as the edge of the spar deck, making the turrets black instead of white.
Ships on tropical station would usually have white hull, superstructure or ochre superstructure, and ochre funnels.
Wartime: Dark Sea Grey (991) all over (except maybe lifeboats, white with brown wash on top).
 Image result for british pre dreadnought ships

France
Peacetime: black hull, upperworks and funnels either silver grey (883) or ochre (913).
Boundaries between hull and upperworks colors tended to vary widely, some placed very high on the ship at spar deck edge, and some lower at main deck edge.. Best to find photos of actual ships.
Wartime: Unknown, probably a Dark Sea Grey (991) or Medium Sea Grey (870) all over. Some sources say French ships have distinct greenish grey, which is supported by some builder's models still in existence.
                - “FIGHTING FLEETS”: black hulls, white upperworks, black funnel tops, DD lt. 
                 grey, subs sea green
Related image 

French battleship Masséna 1898 1:250 cardboard model
French Cruiser Jeanne d'Arc by Kara-ALVAMA
French battleship Iéna 1896 1:200 cardboard model

Italy
Peacetime: Typically black hull with white or Silver Grey (883) upperworks. The transition between black and white could be along the edge of the main deck, or sometimes down the middle of the amidships bulwarks/casemates.
The funnels and masts were commonly painted ochre, and in some cases - such as vessels like Italia or Andrea Doria - the lower half of the funnels would be white and the upper half would be ochre.
In vessels with super-heavy guns, the gun barrels were sometimes painted black or dark grey.
Wartime: Unknown, probably Dark Sea Grey (991) all over.
                - “FIGHTING FLEETS”: Dark Grey
Austria
Peacetime: As with other European fleets, a black hull with white or Silver Grey (883) upperworks and funnels. Unlike the rest of the upperworks and funnels, the ventilators, gun barrels and masts were commonly painted black like the hull. Turret tops seemed to be dark grey.  
Wartime: Reported by Jane's as being Sea Green. The best combination for this seems to be a 1:1 mixture of Medium Sea Grey (870) and Grey Green (866), although straight Grey Green also works while giving a greener but darker appearance.
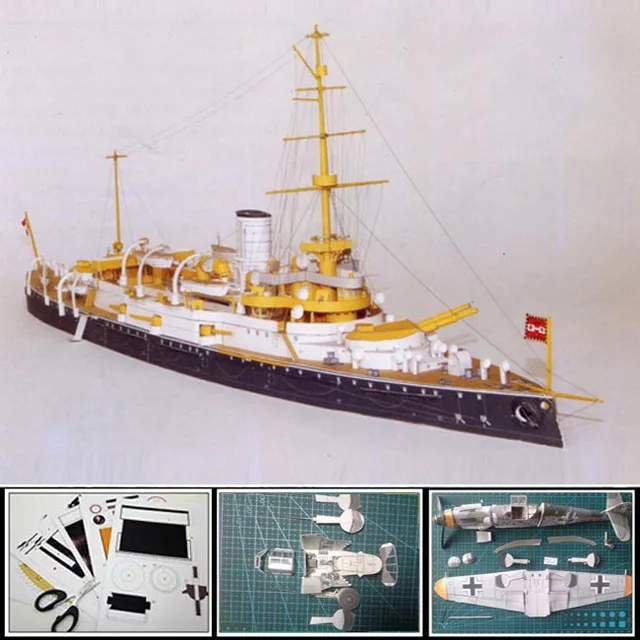
3D Paper Model Battleships Austrian-Hungarian battleship WIEN 1:400 scale 40cm Long 3d puzzles toy model papercraft for adult
https://www.aliexpress.com/item/Free-shipping-Paper-Model-Battleships-Austrian-Hungarian-battleship-WIEN-1-400-scale-40cm-Long-3d-puzzles/1116415373.html


** below is from War Times Journal, always worth checking out for free rules, and the latest Rapid Prototyped Plastic ships!** 
http://www.wtj.com/store/index_paint_guide_hist-paint.html

Painting
A great variety of color schemes was used on warships between 1885 and 1918, but in general these schemes tended to use similar basic colors. Many fleets used bright color schemes for peacetime and more drab color scheme for wartime. Peacetime colors tended to be black, white, light grey and/or ochre. Wartime colors were usually some shade of grey as were most vessels after 1905. Below is a table of the colors we use to paint WTJ fleets, followed by more nationality-specific outlines. 
Paint Type
Usage
Manufacturer
Number
Color
General Notes
Vallejo
951
White
Common lifeboat color
Vallejo
950
Black


Vallejo
862
Black Grey

Vallejo
870
Medium Sea Grey

Vallejo
991
Dark Sea Grey

Vallejo
992
Neutral Grey

Vallejo
883
Silver Grey

Vallejo
913
Yellow Ochre

Vallejo
967
Olive Green

Vallejo
866
Grey Green

Vallejo
821
German Beige

Vallejo
872
Chocolate Brown

Vallejo
898
Dark Sea Blue
Used to paint sea texturing for bases
Vallejo
540
Matte Medium (primer)
Used as undercoat for paint
Vallejo
520
Matte Varnish (sealer)
Used to seal painted ship
Vallejo
510
Gloss Varnish (sealer)
Used to seal textured base
Vallejo
400
Plastic Putty
Used for sea texturing model base
Citadel Colours
61-17
Bleached Bone
Good deck color, but discontinued
Vallejo (custom)
-
Buff & Silver Grey
Custom deck color: x2 parts buff, x1 part silver grey

Monday, May 21, 2018

Portable Naval Wargame Pre-dreadnought Playtest 2

What happens when you are ill-prepared AND have the dice against you....
http://librarydisplays.wolfsonian.org/VIsions%20of%20Victory/wall1/2009.19.650.htm


So, it took longer than I thought to return to "Portable Naval Wargame - Predreadnought" But I finally managed to play it today, RAW, in a compiled format of rules from both the Ironclads and the Predreadnought set. This took a couple of drafts, and there was still a typo in it, but that didn't affect play. So the below is the rules - using hexes - of PNW as Bob Cordery intends.

I took some time to collect ship data from Wiki [so it MUST be correct...] just to build a general idea what these ships were and their relative performance if in full operating condition. This gave me a bit of a rule of thumb for converting ships into PNW stats:


Ships with 8" guns I gave a 6 dice / 5-hex range battery, and those with 5-6" guns a 4 / 4 battery. Hull was about 1 Flotation Point for each 500 tons. If a ship was equipped with torpedoes, I gave them one torpedo attack for the game. Speed was about one hex per 6-7 knots. There were pretty clean breaks in speed, i.e. several ships in the 11-14 knot range, and several in the 18-21 knot range, so this was easiest to convert into relative values.

It is worth noting that the Spanish have more ships, that the Gunnery and Flotation points are nearly identical, the torpedo advantage lies with the Spanish but the speed / ramming edge is clearly with the Americans, with most ships having a 3-hex speed and a ram, while the Spanish have a 2-hex speed and only one ram in the fleet.


For the scenario, I changed the history a bit and had the ES poised to stop the US as they enter Manila Bay. The harbor defenses consist of two land batteries with a 3 / 3 gun battery, and 3 real mine counters and 3 dummy counters, numbered 1-6. 1, 2 and 3 are all real and attack a ship entering the hex with 1, 2, or 3 dice based upon the density of the minefield. 


Below, the mines are placed by me without knowing which are the real mines. This adds a little suspense for me. I concentrate them in the center where the land batteries are weakest, each only putting 1 dice of shooting into the center of the channel, and 2 dice into the hexes next to the fort. This leaves the US with the choice of taking more Gun shots, or risking more mines, which I felt added a balanced tension for decisions.


Each battery [above] has 3 / 3 gun points, so 3 dice and 2-hex range. They can both fire one dice into the center of the channel, and 2 dice into the near hex, giving even coverage across the channel. This coverage seems realistic.

The below is the battlesea [as in battlefield] for the game. The harbor entrance has one squadron of Spanish ships to East and one to South, the East having the larger ships and the South the smaller ones. To somewhat compensate for the mines and batteries, each Spanish squadron has a delay of 1, 2, or 3 turns to get up enough steam to sail, reflecting the surprise of the US attack. I used 3 chits numbered 1-3 and randomly picked two and placed one with each squadron. They will be flipped immediately after the first shot or mine explosion, as the Spanish go to battle stations.


Below, South squadron of three Velasco Class unprotected cruisers and a gunboat.


Below, squadron of two large unprotected cruisers and two small protected cruisers.


Turn 1 movement. There is no gunnery so US enters the board. No ship reaches a mine. I'm planning to send Olympia, center, to whichever side has no mines, or the fewest.


Turn 2, Gunnery. Shore batteries each put 2 Hits on a ship rolling a '6' each and causing Petrel to need to depart the fight [how, I've no idea]. In return, the US Armored Cruisers pound the batteries with three hits each [white dice], enough to suppress them. They will get back one Gunnery Point a turn for three turns if not fired upon again. This is to reflect that it is hard to destroy a stone and earth 'ship' from below! But you can make it hard for them to man the guns while under fire. 


Turn 2 Movement has the small US ships take the lead through the minefield. And, as fate would have it, ALL the mines are only in the center channel! This is just typical of my luck with this naval war...the luck is almost always against the ES and with the US. One awkward aspect of the rules is revealed...as you must move forward one hex before you turn, the Olympia can't turn and avoid the minefield. I put her in the top of the channel instead of messing around with the turning rules.

Turn 3 has no gunnery needed as the forts are suppressed. We head directly to movement, and the ES have a delay of 1 turn for the South squadron, and 3 for the North Squadron. The US therefore moves into the harbor and heads South to destroy the small squadron first. As always seems to happen, I forget to turn over the dice, so now all the turns are off by one! *long, drawn-out sigh* So, add one to every turn from now on!


Turn 4 gunnery. The US takes a few long-range potshots at the ES who are out of range. OF COURSE they roll amazingly well, inflicting 7 hits and missing with zero dice! Fortune really, really doesn't like the Spaniards is all I can say. Castilla takes 4 Hits [out of 6] and Velasco takes 3 [out of 4] and technically both must retreat from the battle. How, I have no idea - it seems like they'll have to fight their way out regardless. [Ignore the Blue die!]


Turn 4 movement. The ES South squadron is free to move and closes in to use torpedoes and hopefully make an impact before getting wiped out. The US also advances, getting their formation broken up a bit due to having to pay for turns. Doesn't seem correct, really.


5 Gunnery. ES has torpedo attacks [3 dice to left of ship] which of course roll amazingly well, while their gunnery is limited to only 1 dice, altho Don Antonio gets a lucky hit. This results in the Concord sinking. In return, the US lays down 3 Hits of gunnery and 3 Hits from a torpedo attack by the Raleigh.


Turn 5, more US gunnery. The bigger US ships are bringing up the rear. Their 8-inch guns pound 5 more Hits in, sinking both the Velasco and the Don Juan and leaving the Don Antonio in poor shape.


Turn 5 Movement has both squadrons closing in as there's little room to maneuver between the shore line and the US squadron.

Turn 6 Gunnery. ES ships are clearly shaken...they miss. US pounds home four more Hits, and both ES ships sink, leaving the squadron a rescue effort rather than a threat.


Turn 6 Movement. The US starts to change course so as to engage the North ES squadron. The Boston, with its slow speed, is forced to venture towards them on its own and await the rest of the US ships to catch up. Worth noting is that a ship with Move 2 can only move 1 Hex forward and turn...a 3-Hex move is significantly better as you can move 1-2 hexes forward and turn, or move 1, turn, move 1. As for the 1-hex move...it's move OR turn.


Turn 7, Movement. With no gunnery, the Petrel continues its painful move off board, while the Squadrons close in on each other. I find the turn rules awkward, but not impossible.


Turn 8 Gunnery. Boston may be slow, but she's deadly - 2 Hits sinks the Reina Cristina who misses in response. Note the Spanish fleet line spreading out due to a turn.


Turn 8 Moves. Both fleets close in, the Spanish hope to tackle the Boston before help arrives. Boston may be able to take care of them with a little luck.


Turn 9 Gunnery. Boston fires a long shot...and of course Hits for 2!


Turn 9 Moves. ES lose initiative, manage to reform line. US moves Boston to intercept, intending to follow Boston in Line Ahead. However, due to a turn, Raleigh needs to slow down to 2-hexes so the two AC can keep up. It probably doesn't matter as Raleigh is a pretty solid ship and could leave the other two behind and support Boston.


Turn 10 Gunnery. Boston "unleashes hell" and rolls 5 Hits on Castilla! However, the ES beat their luck and not only shoot for 4 Hits, but unleash ES cruise missile torpedoes for 2 more! Needless to say, Boston and Castilla sink.


Turn 10 Movement. ES continue on converging course as the closer they are the better it is for them since their gunnery is outranged. Raleigh leads the Baltimore and Olympia as quickly as possible, but the turn slows them down and they only manage to get two into firing position. Still, it will probably be more than enough...


Turn 11 Gunnery. For a change, the US misses, and the ES hits for 3 - Viva Espagna!!


Turn 11 Movement. The US is not afraid to close the range, having the more powerful guns and only lightly damaged ships. Still, the Spanish will go down fighting!


Turn 12 Gunnery. a weak effort by ES, who are then devastated by the best shot of the game, as the Baltimore puts out enough hits to sink a pre-dreadnought, much less a protected cruiser - 7 HITS!! Isla de Luzon has debris flying back to Luzon...


Turn 12 Movement, Turn 13 Gunnery. ES win Initiative, get to counter-move to the US Armored Cruisers. They will not be in ideal position either way, so elect to move farther ahead. Of course, it doesn't matter and the Isla de Cuba whiffs then is blown to kingdom come by the same sharpshooter on the Baltimore - 5 Hits inflicted! 


Final Tally: ES lose fleet of eight ships, US loses three [almost four] of six. However, both Armored Cruisers are in good shape, and they dominate the waves. The only way to even the score strategically would be to sabotage the Olympia so her coal bunker blows up. Hmmmm....now why did I think of that? Anyway, I liked how the scenario played out overall, except that it really seems as though FATE has it in for the Spaniards - they are weak in every aspect of naval operations, AND they have lousy luck! I want them to win, someday...


The rules worked OK for "simple", but I feel they are actually a bit too simple, and that with just a few design changes will be easier and give better feel for naval combat.


Pondering the Move / Turn system. Ships must move forward one hex and can then make one turn of one hex side. Let's explore some of the consequences of this mechanic.

Petrel is trying to follow the rules and exit the battlefield due to Flotation Point losses being at Critical Point. Let's forget the shore battery for now, and just think about maneuvering around the minefield:

- Petral has Move 2, and can advance 2 hexes.
But if she does, she has to move into the minefield as you can't turn until you have moved forward one hex. Not very appealing for a crippled ship!

Instead, if she moves forwards 1 HEX this turn...
She can then move forward one hex next turn, and make a turn to the left, which costs one point of movement anyway.
This is pretty awkward as it means you have to stop at least one hex ahead of any obstacle requiring a course change. This could of course be justified by saying that these ships don't turn on a dime. HOWEVER, with no time / distance scale, it really isn't possible to compute if this is reasonable or not.


Move / Turn system, squadron in Line Ahead [following a lead ship in column].

The US squadron is in Line Ahead, and all three ships have Move 3.
If Raleigh in front moves the full 3 hexes, she leaves behind Baltimore and Olympia who have to pay for a turn and can therefore only move 2 total hexes - there's now a gap in the Line Ahead formation.

The solution is that Raleigh has to move forward only 2 hexes, so that the other two ships can make their turn and keep up. Net effect is that a 60 degree turn costs 33% of Move.

Ok, so there's the problem - what might be the solution to this and the awkward zig-zagging of fire arcs?

Hexe facing variant - face ships to the spine, not the flat.  Can execute a small turn for free as it can move into *either* front hex. This also solves the problem of not being able to head straight across the board in the 3 or 9 o'clock direction below [you have to face 60 up, move, turn, move, turn, move, turn, etc, so it effectively costs twice as much to move straight in 2 of the 4 directions [board East-West].
This also makes the fire arcs easier to figure out. Pencils show how the front arc is straight down the spines, rear same off the stern, while the broadsides are cleanly along the spine line to each side.

Below, using spine facing, a squadron in Line Ahead executes a gentle turn around an obstacle [yellow dice].

Boston moves two hexes with gentle turn to left. Next turn, she moves one hex and pays one move point for 60-degree turn to next spine to left. Or, she could remain facing the same direction and just keep gently angling in either front direction.


Portable Naval Wargame - Predreadnought Rules thoughts:
  1. A guide to translate ship stats into the game from Wiki, Janes, etc is needed.
  2. The -1 dice / hex for gunnery means that ships actually have a max range of 1 hex less than rules state, i.e. a ship with a listed 6-hex range actually has a 5-hex range. This leaves you with the more awkward rule of "-1 dice for every hex past 1" so as to have a 6-hex range with a 6 / 6 battery. Or you can live with the 1-hex range discrepency. 
  3. Paying a hex of movement to turn one hex side is awkward. The net effect is that it slows a line ahead [column] down by 33-50% depending on their Move rate which seems extreme. In a chase you'd never want to change direction, even to farther away from the enemy fleet chasing you as you'd lose "ground".
  4. Restricting turns to one side after one hex forward of movement slows the game down quite a bit and makes it feel less "fluid", no pun intended. I see the goal, but I say ditch the turning cost and restriction - they don't make sense in the scale of the game, making it feel a lot more like 1800 than 1880.
  5. Torpedoes are way too good. They should have only a small chance to hit [say, a natural '6'] but if they do they cause 2 FP damage.
  6. The ability to shoot at any target, not just the nearest, results in a "shoot until it sinks" gunnery mechanism which is not realistic. Target acquisition was a major crew proficiency and gear test and was not easily done. Rather, it took a little while to range in and THEN you let fly with the whole broadside - game doesn't really reflect this.
  7. The hex mechanism doesn't really save much time and effort. True, you don't need to use measuring devices, but the fire arcs are actually a zig-zag pattern that is hard to follow - facing ships along the spine would solve that. It would also help with the turning issue - you could still charge a move point for a large turn, but gentle turns in any map board / hex alignment direction are all possible or you can move straight in any direction.
  8. I'm trying to figure out why ships should move at all in game terms. Scenario victory conditions and differences in gun ranges may force it. But if both sides are content with range, all ships could just not move at all. Perhaps one should get a bonus shooting at a ship that doesn't move?
Overall, I think these are an interesting set of mechanics. I feel that they err on the side of TOO simple, and that just a little bit more would both clean them up and give better naval feel. The hexes don't help much, I think it'd be easier just to use a Grid and allow ships to face either a spine or an edge [so 8 total directions]. However, it is almost as easy and feels more realistic to not bother with any sort of grid or hex at all - there's plenty of turn mechanics and gadgets to use that are simple and players pick up quickly, even if newbies.

In any event, Bob Cordery has given us a lot to think about for free, so "thanks Bob!"