Monday, May 21, 2018

Portable Naval Wargame Pre-dreadnought Playtest 2

What happens when you are ill-prepared AND have the dice against you....
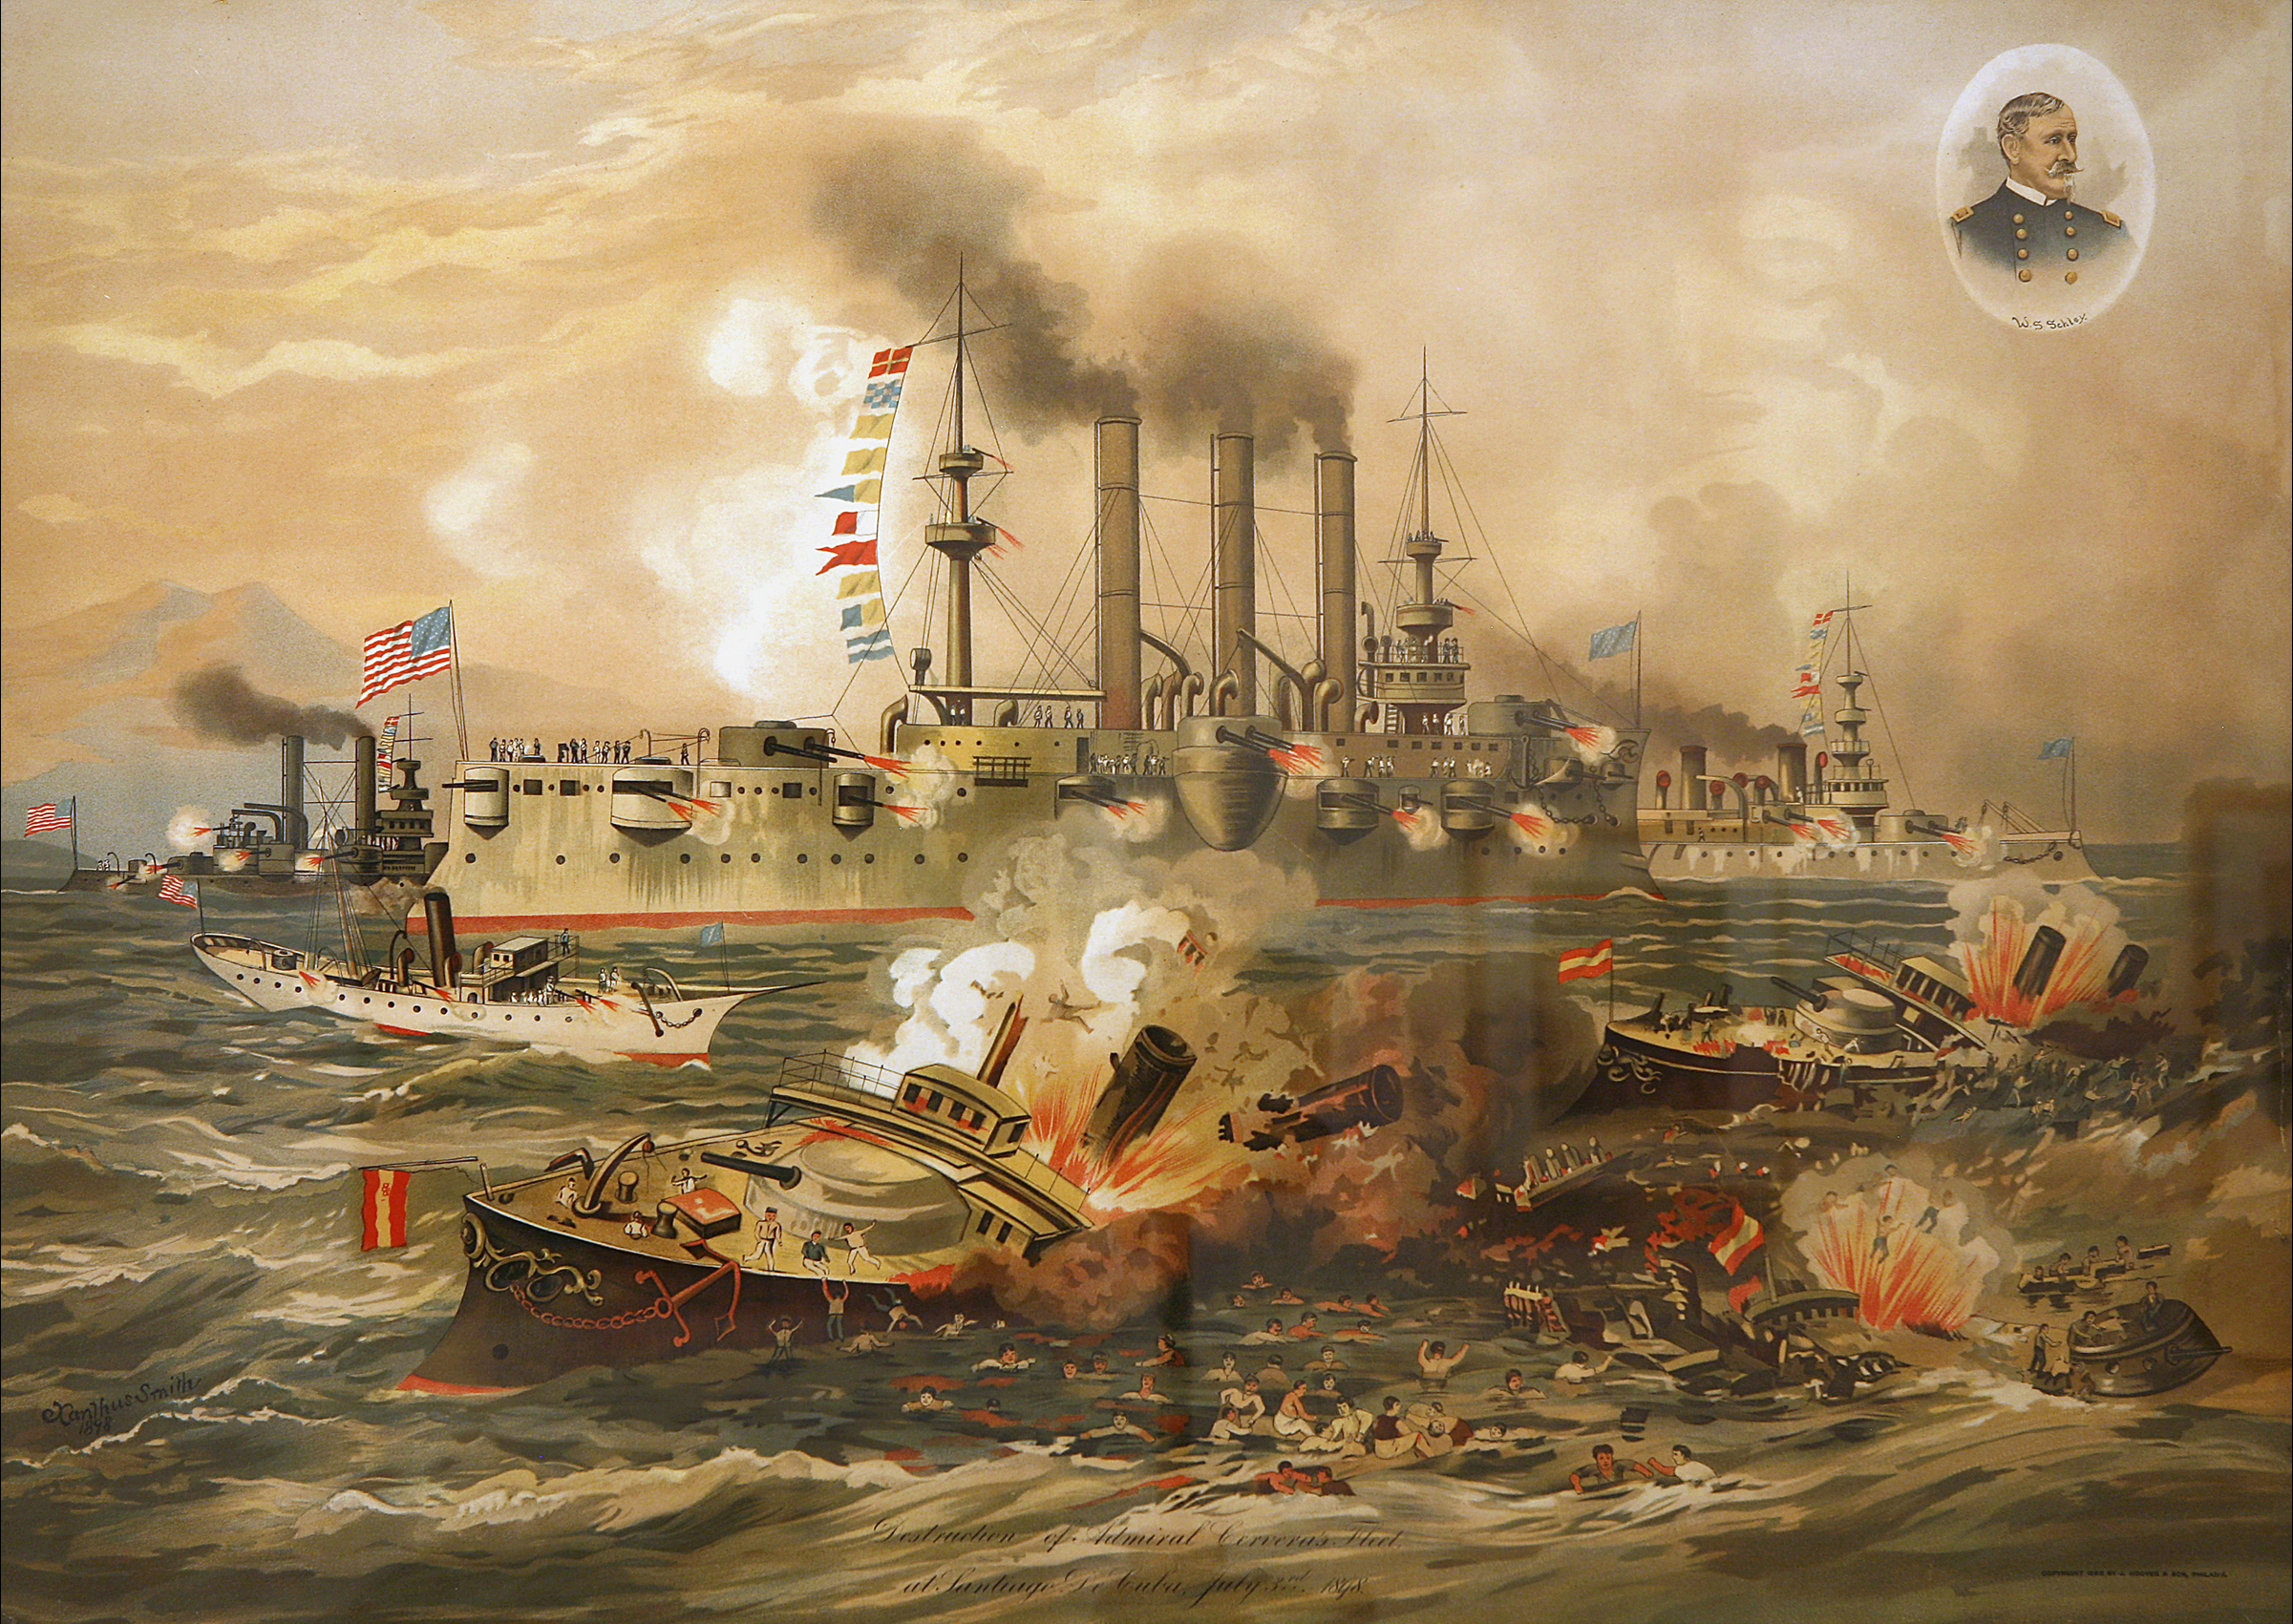
http://librarydisplays.wolfsonian.org/VIsions%20of%20Victory/wall1/2009.19.650.htm


So, it took longer than I thought to return to "Portable Naval Wargame - Predreadnought" But I finally managed to play it today, RAW, in a compiled format of rules from both the Ironclads and the Predreadnought set. This took a couple of drafts, and there was still a typo in it, but that didn't affect play. So the below is the rules - using hexes - of PNW as Bob Cordery intends.

I took some time to collect ship data from Wiki [so it MUST be correct...] just to build a general idea what these ships were and their relative performance if in full operating condition. This gave me a bit of a rule of thumb for converting ships into PNW stats:


Ships with 8" guns I gave a 6 dice / 5-hex range battery, and those with 5-6" guns a 4 / 4 battery. Hull was about 1 Flotation Point for each 500 tons. If a ship was equipped with torpedoes, I gave them one torpedo attack for the game. Speed was about one hex per 6-7 knots. There were pretty clean breaks in speed, i.e. several ships in the 11-14 knot range, and several in the 18-21 knot range, so this was easiest to convert into relative values.

It is worth noting that the Spanish have more ships, that the Gunnery and Flotation points are nearly identical, the torpedo advantage lies with the Spanish but the speed / ramming edge is clearly with the Americans, with most ships having a 3-hex speed and a ram, while the Spanish have a 2-hex speed and only one ram in the fleet.


For the scenario, I changed the history a bit and had the ES poised to stop the US as they enter Manila Bay. The harbor defenses consist of two land batteries with a 3 / 3 gun battery, and 3 real mine counters and 3 dummy counters, numbered 1-6. 1, 2 and 3 are all real and attack a ship entering the hex with 1, 2, or 3 dice based upon the density of the minefield. 


Below, the mines are placed by me without knowing which are the real mines. This adds a little suspense for me. I concentrate them in the center where the land batteries are weakest, each only putting 1 dice of shooting into the center of the channel, and 2 dice into the hexes next to the fort. This leaves the US with the choice of taking more Gun shots, or risking more mines, which I felt added a balanced tension for decisions.


Each battery [above] has 3 / 3 gun points, so 3 dice and 2-hex range. They can both fire one dice into the center of the channel, and 2 dice into the near hex, giving even coverage across the channel. This coverage seems realistic.

The below is the battlesea [as in battlefield] for the game. The harbor entrance has one squadron of Spanish ships to East and one to South, the East having the larger ships and the South the smaller ones. To somewhat compensate for the mines and batteries, each Spanish squadron has a delay of 1, 2, or 3 turns to get up enough steam to sail, reflecting the surprise of the US attack. I used 3 chits numbered 1-3 and randomly picked two and placed one with each squadron. They will be flipped immediately after the first shot or mine explosion, as the Spanish go to battle stations.


Below, South squadron of three Velasco Class unprotected cruisers and a gunboat.


Below, squadron of two large unprotected cruisers and two small protected cruisers.


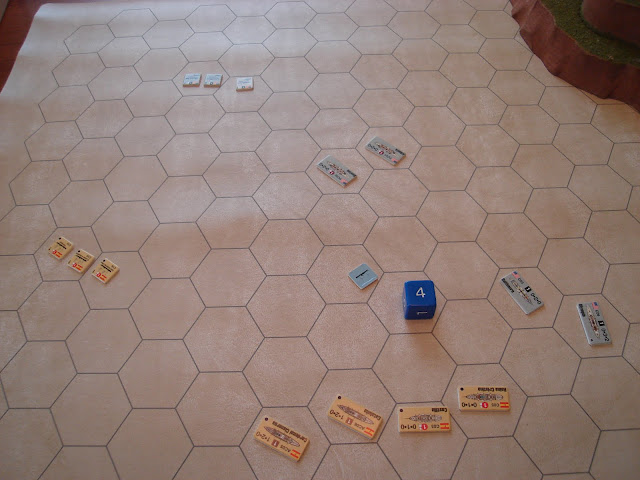
Turn 1 movement. There is no gunnery so US enters the board. No ship reaches a mine. I'm planning to send Olympia, center, to whichever side has no mines, or the fewest.
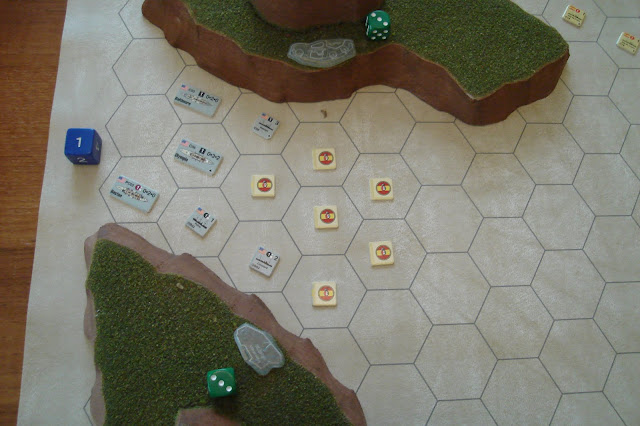


Turn 2, Gunnery. Shore batteries each put 2 Hits on a ship rolling a '6' each and causing Petrel to need to depart the fight [how, I've no idea]. In return, the US Armored Cruisers pound the batteries with three hits each [white dice], enough to suppress them. They will get back one Gunnery Point a turn for three turns if not fired upon again. This is to reflect that it is hard to destroy a stone and earth 'ship' from below! But you can make it hard for them to man the guns while under fire. 


Turn 2 Movement has the small US ships take the lead through the minefield. And, as fate would have it, ALL the mines are only in the center channel! This is just typical of my luck with this naval war...the luck is almost always against the ES and with the US. One awkward aspect of the rules is revealed...as you must move forward one hex before you turn, the Olympia can't turn and avoid the minefield. I put her in the top of the channel instead of messing around with the turning rules.

Turn 3 has no gunnery needed as the forts are suppressed. We head directly to movement, and the ES have a delay of 1 turn for the South squadron, and 3 for the North Squadron. The US therefore moves into the harbor and heads South to destroy the small squadron first. As always seems to happen, I forget to turn over the dice, so now all the turns are off by one! *long, drawn-out sigh* So, add one to every turn from now on!


Turn 4 gunnery. The US takes a few long-range potshots at the ES who are out of range. OF COURSE they roll amazingly well, inflicting 7 hits and missing with zero dice! Fortune really, really doesn't like the Spaniards is all I can say. Castilla takes 4 Hits [out of 6] and Velasco takes 3 [out of 4] and technically both must retreat from the battle. How, I have no idea - it seems like they'll have to fight their way out regardless. [Ignore the Blue die!]


Turn 4 movement. The ES South squadron is free to move and closes in to use torpedoes and hopefully make an impact before getting wiped out. The US also advances, getting their formation broken up a bit due to having to pay for turns. Doesn't seem correct, really.


5 Gunnery. ES has torpedo attacks [3 dice to left of ship] which of course roll amazingly well, while their gunnery is limited to only 1 dice, altho Don Antonio gets a lucky hit. This results in the Concord sinking. In return, the US lays down 3 Hits of gunnery and 3 Hits from a torpedo attack by the Raleigh.


Turn 5, more US gunnery. The bigger US ships are bringing up the rear. Their 8-inch guns pound 5 more Hits in, sinking both the Velasco and the Don Juan and leaving the Don Antonio in poor shape.


Turn 5 Movement has both squadrons closing in as there's little room to maneuver between the shore line and the US squadron.

Turn 6 Gunnery. ES ships are clearly shaken...they miss. US pounds home four more Hits, and both ES ships sink, leaving the squadron a rescue effort rather than a threat.


Turn 6 Movement. The US starts to change course so as to engage the North ES squadron. The Boston, with its slow speed, is forced to venture towards them on its own and await the rest of the US ships to catch up. Worth noting is that a ship with Move 2 can only move 1 Hex forward and turn...a 3-Hex move is significantly better as you can move 1-2 hexes forward and turn, or move 1, turn, move 1. As for the 1-hex move...it's move OR turn.


Turn 7, Movement. With no gunnery, the Petrel continues its painful move off board, while the Squadrons close in on each other. I find the turn rules awkward, but not impossible.


Turn 8 Gunnery. Boston may be slow, but she's deadly - 2 Hits sinks the Reina Cristina who misses in response. Note the Spanish fleet line spreading out due to a turn.


Turn 8 Moves. Both fleets close in, the Spanish hope to tackle the Boston before help arrives. Boston may be able to take care of them with a little luck.


Turn 9 Gunnery. Boston fires a long shot...and of course Hits for 2!


Turn 9 Moves. ES lose initiative, manage to reform line. US moves Boston to intercept, intending to follow Boston in Line Ahead. However, due to a turn, Raleigh needs to slow down to 2-hexes so the two AC can keep up. It probably doesn't matter as Raleigh is a pretty solid ship and could leave the other two behind and support Boston.


Turn 10 Gunnery. Boston "unleashes hell" and rolls 5 Hits on Castilla! However, the ES beat their luck and not only shoot for 4 Hits, but unleash ES cruise missile torpedoes for 2 more! Needless to say, Boston and Castilla sink.


Turn 10 Movement. ES continue on converging course as the closer they are the better it is for them since their gunnery is outranged. Raleigh leads the Baltimore and Olympia as quickly as possible, but the turn slows them down and they only manage to get two into firing position. Still, it will probably be more than enough...


Turn 11 Gunnery. For a change, the US misses, and the ES hits for 3 - Viva Espagna!!


Turn 11 Movement. The US is not afraid to close the range, having the more powerful guns and only lightly damaged ships. Still, the Spanish will go down fighting!


Turn 12 Gunnery. a weak effort by ES, who are then devastated by the best shot of the game, as the Baltimore puts out enough hits to sink a pre-dreadnought, much less a protected cruiser - 7 HITS!! Isla de Luzon has debris flying back to Luzon...


Turn 12 Movement, Turn 13 Gunnery. ES win Initiative, get to counter-move to the US Armored Cruisers. They will not be in ideal position either way, so elect to move farther ahead. Of course, it doesn't matter and the Isla de Cuba whiffs then is blown to kingdom come by the same sharpshooter on the Baltimore - 5 Hits inflicted! 


Final Tally: ES lose fleet of eight ships, US loses three [almost four] of six. However, both Armored Cruisers are in good shape, and they dominate the waves. The only way to even the score strategically would be to sabotage the Olympia so her coal bunker blows up. Hmmmm....now why did I think of that? Anyway, I liked how the scenario played out overall, except that it really seems as though FATE has it in for the Spaniards - they are weak in every aspect of naval operations, AND they have lousy luck! I want them to win, someday...


The rules worked OK for "simple", but I feel they are actually a bit too simple, and that with just a few design changes will be easier and give better feel for naval combat.


Pondering the Move / Turn system. Ships must move forward one hex and can then make one turn of one hex side. Let's explore some of the consequences of this mechanic.

Petrel is trying to follow the rules and exit the battlefield due to Flotation Point losses being at Critical Point. Let's forget the shore battery for now, and just think about maneuvering around the minefield:

- Petral has Move 2, and can advance 2 hexes.
But if she does, she has to move into the minefield as you can't turn until you have moved forward one hex. Not very appealing for a crippled ship!

Instead, if she moves forwards 1 HEX this turn...
She can then move forward one hex next turn, and make a turn to the left, which costs one point of movement anyway.
This is pretty awkward as it means you have to stop at least one hex ahead of any obstacle requiring a course change. This could of course be justified by saying that these ships don't turn on a dime. HOWEVER, with no time / distance scale, it really isn't possible to compute if this is reasonable or not.


Move / Turn system, squadron in Line Ahead [following a lead ship in column].

The US squadron is in Line Ahead, and all three ships have Move 3.
If Raleigh in front moves the full 3 hexes, she leaves behind Baltimore and Olympia who have to pay for a turn and can therefore only move 2 total hexes - there's now a gap in the Line Ahead formation.

The solution is that Raleigh has to move forward only 2 hexes, so that the other two ships can make their turn and keep up. Net effect is that a 60 degree turn costs 33% of Move.

Ok, so there's the problem - what might be the solution to this and the awkward zig-zagging of fire arcs?

Hexe facing variant - face ships to the spine, not the flat.  Can execute a small turn for free as it can move into *either* front hex. This also solves the problem of not being able to head straight across the board in the 3 or 9 o'clock direction below [you have to face 60 up, move, turn, move, turn, move, turn, etc, so it effectively costs twice as much to move straight in 2 of the 4 directions [board East-West].
This also makes the fire arcs easier to figure out. Pencils show how the front arc is straight down the spines, rear same off the stern, while the broadsides are cleanly along the spine line to each side.

Below, using spine facing, a squadron in Line Ahead executes a gentle turn around an obstacle [yellow dice].

Boston moves two hexes with gentle turn to left. Next turn, she moves one hex and pays one move point for 60-degree turn to next spine to left. Or, she could remain facing the same direction and just keep gently angling in either front direction.


Portable Naval Wargame - Predreadnought Rules thoughts:
  1. A guide to translate ship stats into the game from Wiki, Janes, etc is needed.
  2. The -1 dice / hex for gunnery means that ships actually have a max range of 1 hex less than rules state, i.e. a ship with a listed 6-hex range actually has a 5-hex range. This leaves you with the more awkward rule of "-1 dice for every hex past 1" so as to have a 6-hex range with a 6 / 6 battery. Or you can live with the 1-hex range discrepency. 
  3. Paying a hex of movement to turn one hex side is awkward. The net effect is that it slows a line ahead [column] down by 33-50% depending on their Move rate which seems extreme. In a chase you'd never want to change direction, even to farther away from the enemy fleet chasing you as you'd lose "ground".
  4. Restricting turns to one side after one hex forward of movement slows the game down quite a bit and makes it feel less "fluid", no pun intended. I see the goal, but I say ditch the turning cost and restriction - they don't make sense in the scale of the game, making it feel a lot more like 1800 than 1880.
  5. Torpedoes are way too good. They should have only a small chance to hit [say, a natural '6'] but if they do they cause 2 FP damage.
  6. The ability to shoot at any target, not just the nearest, results in a "shoot until it sinks" gunnery mechanism which is not realistic. Target acquisition was a major crew proficiency and gear test and was not easily done. Rather, it took a little while to range in and THEN you let fly with the whole broadside - game doesn't really reflect this.
  7. The hex mechanism doesn't really save much time and effort. True, you don't need to use measuring devices, but the fire arcs are actually a zig-zag pattern that is hard to follow - facing ships along the spine would solve that. It would also help with the turning issue - you could still charge a move point for a large turn, but gentle turns in any map board / hex alignment direction are all possible or you can move straight in any direction.
  8. I'm trying to figure out why ships should move at all in game terms. Scenario victory conditions and differences in gun ranges may force it. But if both sides are content with range, all ships could just not move at all. Perhaps one should get a bonus shooting at a ship that doesn't move?
Overall, I think these are an interesting set of mechanics. I feel that they err on the side of TOO simple, and that just a little bit more would both clean them up and give better naval feel. The hexes don't help much, I think it'd be easier just to use a Grid and allow ships to face either a spine or an edge [so 8 total directions]. However, it is almost as easy and feels more realistic to not bother with any sort of grid or hex at all - there's plenty of turn mechanics and gadgets to use that are simple and players pick up quickly, even if newbies.

In any event, Bob Cordery has given us a lot to think about for free, so "thanks Bob!"

Tuesday, May 15, 2018

Pre-dreadnought Project, p.3: Fleet Arrives

"You may anchor when ready, Gridley."
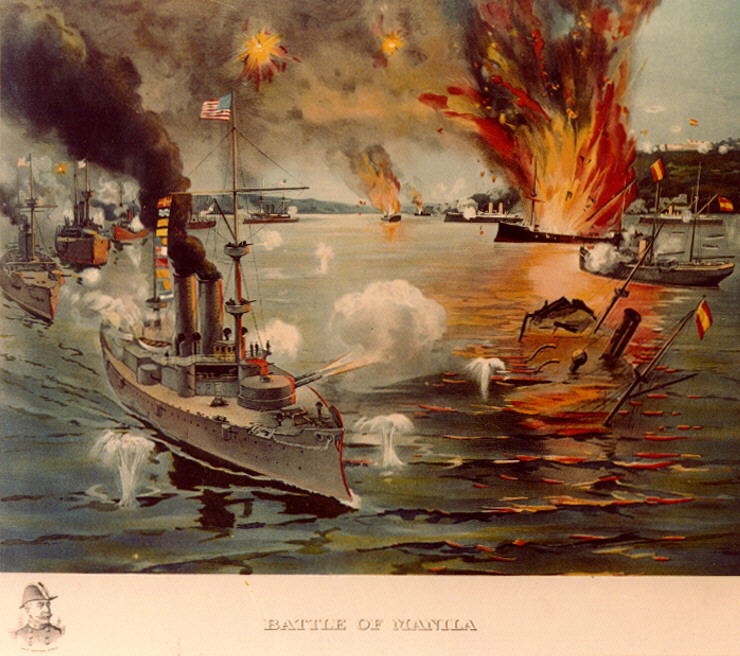
Related image

Hooray, the WTJ squadrons have arrived!

The box came from Wartimes Journal yesterday - not a bad turnaround time for print-on-demand plastics, which were in the order and delayed things a bit. The  pewter stock was all on hand. Order was placed April 26 and would've arrived quickly but for the plastics which had it arrive Monday the 14th, or 18 days total.

As always, the items were carefully packed in his special blister seals between bubbles system, and there was no breakage I can see, altho the plastic items make me a bit nervous - they're pretty strong but they don't LOOK strong! 31 of the 33 ships were available, and of course all the plastic was available. Below, metal hanging on box, plastics on table.


The pewter castings have the usual bits of flash and some have mold lines but they aren't pronounced. I like them and their heft - I've always preferred the metals to plastics in that regard, they FEEL right! However, the line is being discontinued due to the ease of working with the plastics, plus they offer better detail, little to no flash, and great variety in scale.

*sigh* Don't know what will happen to the excess pewter ships...but I asked.

Plastics below. wrecks at top left and right, fighting tops down the left, destroyers / torpedo boats center, land batteries to right. One error with extra large and no medium fighting tops that Jim at WTJ caught and is going to correct. I get some extra large ones out of it!


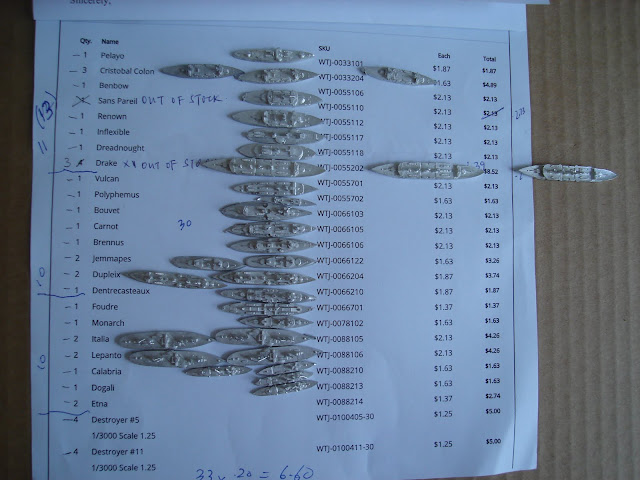
Below, entire order laid out for tallying and checking.


The pewter list and ships from top down. You can see nice details like decks and lifeboats. Spanish at top, followed by French, British, one Austrian and the Italian ships, all conveniently numbered by nationality on the bottom of the hull - and quite clear if small. Very useful! Note how large the Drake is - at 14,000+ tons and 500+ feet, she was quite large for the period, bigger than many battleships.

Regret that the lighting didn't come out as bright as it was in the room, but the flash would've made the pics worse.

I'm looking forward to this as a pretty quick prep, paint, and play project, that is also portable, and playable on a small space, so I can travel with it. Am enjoying working with the PW rules, and have a re-fight of Manila already planned for ASAP.

This era also encourages a sort of simplicity in play, also. The battles are mostly about gunnery as torpedoes just aren't that effective yet - altho they are a threat. Thus the primary tension is in maneuvering and firing, and we must rely on the scenarios to prevent us from getting bored with a "line them up and sink everything in sight" sort of game. Yet, there is some opportunity for odd weapons like spar torpedo boats, submarines and perhaps even a balloon attack - or observation - that make it a bit more interesting than a wooden ships and iron men era fight.

Once again, "Full Steam Ahead!"

Wednesday, May 9, 2018

Portable Naval Wargame Pre-dreadnought Playtest 1

"You may fire when ready, Gridley"
-- "Sir, do you think that someday the game will take longer than the real battle?"
"For some, definitely. For other, wiser gamers, one can hope not."
USS Olympia art NH 91881-KN.jpg
Ah, the perils of failing to prepare... Public Domain, https://commons.wikimedia.org/w/index.php?curid=866380

I always have space in my life for quick-playing historical miniature games that evoke history, put forward key command decisions, and require a little to modest outlay of cash, time, and effort. My ideal standard is "can I bang out a couple of these games in the span of time between putting Admiral Winkie to bed and going to bed myself [at a reasonable hour soasnotto ruin my next day of work]. So with many rule sets to choose from, I find myself trying out a Portable Wargame for the first time.

This being a first playtest of the Portable Wargame Pre-dreadnought rules, located HERE, I wanted to stick closely to the RAW, tempting as it was to add things, etc. The principles being that one should _always_ try the RAW to better understand the designer's intent and to show a little humility...after all, games don't always play the way they read and “God resists the proud, But gives grace to the humble”. Furthermore, you just might learn something and be a better gamer / designer yourself! So I curbed my enthusiasm.

However, I did have to try to figure out if ships always faced a hex side [very likely] or could also face the spine - the issue being that moving _straight_ sideways across the board is impossible with 6, not 8 directions. I decided to go for the spine and see what happens With 12 directions to face I also made a 1-point turn free, while a 2-point turn [equal to one hex side to one hex side] costs 1 hex of movement, per the rules.

The plan is to use counters from my classic version Avalanche Press board game, "1898"  [now renamed and expanded] on a hex mat, respecting the small / portable game format, and incidentally setting myself up for the arrival of my 1/3000 ships which will be around the same size. Key questions being:
- can I fit this into my 3x3 desk area?
- can I fit this into under an hour?
- are the mechanics tedious and exhausting or do they let me think about squadron commander decisions as opposed to advising gunners on other ships as to the rounds to use, the windage to try, the aiming point, and other impossibilities?
Let's see...

I spent a couple days trying to classify the ships according to the rules and drawing up ship rosters for a Battle of Manila Bay scenario:

Ships are defined by TYPE, within which they are uniformly armed, moving and floating in 8 Classes from Dreadnought to Torpedo Boat: Dreadnoughts max at 8 fire dice firing up to range 8 but only a 2 hex move, while the lowly TB at 2 / 2 dice & range but a 5 hex move. Certainly, one can adapt this to an applied historical standard with little effort if desired.

Interesting game mechanics are:
- The TURN starts with all gunnery / torpedo attacks simultaneous.
- Initiative roll: loser moves first, followed by winner
- GUNNERY is a total of dice, say 8 for pre-dreadnoughts, that lose 1 dice / hex to target. So there no differentiation of gun type - ships fire a total broadside with decreasing effect with distance. Thus, a pre-dread firing 8 dice at a ship 4 hexes away has 4 dice left with which to shoot.

I found my 25"x25" Chessex vinyl hex mat, heretofore never used. While the Spanish fleet was historically weaker than mere ship specs would express, my assumption in this replay is that the Spanish fleet was forewarned and better prepared than in the historical event. I stuck a hill in the "northeast" corner to represent the edge of Manila Bay, and went at it full speed!

In game terms, they had the following forces:
Spanish: 2 Protected Cruisers, 2 Light Cruisers, 3 Destroyers and 1 Torpedo Boat.
Americans: 1 Armored Cruiser, 3 Protected Cruisers, 3 Destroyers.
The Spanish were lined up building up steam in their anchorage, and limited to 1 hex of move Turn 1. The USA could enter anywhere from the West board edge at full speed, and took the first move on Turn 1. 

Above, the US fleet enters with its faster ships in the lead, followed by the rest in order of gunpower. I figure this central approach would put the US in a position to engage the ES if they moved forwards, but plenty of time to react if they tried to shift away. I was only partially right! All ships are out of range, even the AC Olympia with a 6/6 battery.

Turn 2. US wins the Initiative roll. The ES move directly ahead, hoping to cross the "T" of the advancing gringos. This they are able to do so the US turns left, hoping to catch the rear of the Spanish fleet and destroy the small boats right away. 

Turn 3, gunnery [above]. The Olympia is the only ship that gets a hit, there being few dice and you need a 4-5 for 1 Hit, or a 6 for 2 Hits, each Hit removing one Flotation Point [once the green FP are gone, ship must retreat off board].

Turn 3, ES movement. US again wins Initiative, 6-3, so the Spanish move first. They turn right to close range as their best guns are 4/4 while the Olympia is at 6/6. They also drive their DDs in for a torpedo attack on the US line of battle.


Turn 3, US movement. The US responds by circling their DDs left to engage what will in future be where the ES fleet will be [they hope] while the cruisers accept the challenge and engage the DDs at close range, the better to engage them in gunnery. With Torpedoes having a 3-hex range and the hit factor unaffected by range, it is better for the guns to get into point blank range as they can't avoid the 3-hex attack. There's no mention of ships being in the same hex, but I said "up to one big ship of each side, and 2 small ships = one big ship, so the two Spanish DDs are in the hex with one US PC each.

From the Spanish point of view, this hasn't worked that great for the big ships - they are out of or at extreme range while the tail of the battle line is in range of the US ships. However, there's high hopes that the Torpedo attack will work out...plus, there's some drama!

Turn 4, Gunnery. The Reina Cristina [end of line] gets hammered by the Olympia and Baltimore. The exchange of cruiser Guns and Torpedo / Guns results in the TB Gen Lezo sinking [and...it didn't have any torpedoes, oops] and the Velasco losing its 3 Green FP and now needing to leave the action. However, the US PCs take some bad damage - the Boston has to leave the battle and the Raleigh lost 2 FP.


Turn 4 Movement. They finally win an IN roll, so the US fleet executes a complex plan. The Boston heads to the North board edge, away from the ES fleet and towards the US DDs, escorted by the Raleigh. The two other US line ships, including the powerful Olympia, start turning into the rear of the ES line. The ES respond by pulling away as fast as possible, turning towards their own DDs who are chasing the smaller US ships.


Turn 5 US Gunnery results in the Baltimore sinking the heavily damaged Reina Cristina, and the Olympia putting the Castilla to the halfway point with some great shooting. However, I somehow got confused and sank her [thus illustrating gamemaster incompetence but driving the historical result thru Spanish incompetence and lack of preparation].


Turn 5 ES Gunnery. All misses. Is this the inevitability of history in action???


Turn 5 Movement. Spanish win IN, and US cruisers fall behind [perhaps picking up survivors from the stricken Spanish ships??] while the Spanish maneuver for revenge: DDs against the two weakened PC Raleigh and Boston, and their two PC against the US DDs.

Looking at the above, it is definitely possible for the Spanish to turn this around by sinking some of these 5 isolated US ships - but will they?  WILL THEY??

Turn 6 Gunnery. The dispersed situation of the ships results in just a couple hits on the DD Petrel and one on the Don Juan de Austria. BUT, the star gunnery of Olympia results in 2 Hits at max range...with one dice! When in doubt...roll well.


Turn 6 Movement. US wins back the IN, finally. The Spanish ships try to place themselves for some solid gunnery. The US DDs dodge into the lee of the Luzon to avoid fire from the Cuba. The Boston makes it off the board, while the Raleigh positions itself to advantage. The Baltimore and Olympia pursue the last two strong ES ships.


Turn 7, North Gunnery. The ES DDs rip up the Raleigh, showing that they, at least, practiced gunnery during peacetime! They give it 3 Hits and knock out its green FP - it will have to withdraw. In return, the Raleigh manages only one hit on Don Juan de Austria.

Turn 7, West Gunnery. The ES guns are poor - should've got 4 hits, but flagship Luzon got a 2-hit on Concord. In return, the US gunboats inflict 3x as many hits and trash the Luzon, which will now have to retreat off the nearby board edge. At the least, Petrel and Condorde should've been lost for that exchange. Ah the perils of failing to prepare!!! The menacing [and lucky] Olympia is thankfully out of range, as is the Baltimore.


Turn 7, Movement. The Spanish seize the IN back, and US maneuvering doesn't stop the the Isla de Cuba maneuvering well and getting the DDs into her sights. Raleigh joins Boston off the board, and the Luzon departs the battle with the Velasco, also.


Turn 8, gunnery [forgot to turn dice over]. Spanish manage 3 Hits but fail to sink McCulloch, altho they knock out her green FP. But, they don't lose more ships, so that's good news! 


Turn 8 US Movement. Options are dwindling but the Spanish win IN. The US close up with the untouched Olympia and Baltimore...

Turn 8 ES Movement. The Cuba pushed ahead quickly to try and sink a US DD, while the ES DDs curve around the rear of the US battle line to avoid the full broadside power, and shelter in the lee of the Baltimore from the Olympia. Cunning plan and good handling!


Turn 9 Gunnery. ES DDs once again show they practiced in peacetime, putting some Hits on the nearly fresh Baltimore. The Olympia again shows itself the master of long-range gunnery, and puts 2 Hits on the Cuba with one lucky long-range shot [give that gunner an extra rum ration!]. This is joined by the Petrel putting another 2 Hits on Cuba who then misses entirely, perhaps due to the damage control efforts?


Turn 9 US Movement. Spanish win again, so the US tries to block in the Cuba best as they can. The two DDs blocking from the front, the cruisers from the rear...


Turn 9 ES Movement. The Cuba retreats along with the Austria. With no possible way to hold off the US cruisers, the Uloa sails off the board, also. Note that one of the US DDs also has to retreat.


Final tally of destruction: ES lose three ships sunk [one mistakenly], and four retreated. The US has four retreated, almost 5 with Baltimore, and none sunk [without a Castilla error, the result could've been quite different, almost a tie, I think].


Whew! what a great contest! Enjoyable game and not terribly taxing. Thoughts:

  1. Must pay better attention to gunnery results and not accidentally sink Spanish ships...as if they don't have enough problems already!
  2. In retrospect, I think that RAW says ships can't face the spines, only the 6 hex sides, with a ship. I don't like this since you can't move straight, laterally, on one direction of  the hex board.
  3. Need some Line of Sight rules, altho I winged it just fine placing the counters within the oversized hexes without any trouble.
  4. Needs some stacking rules.
  5. I really liked the simple gunnery mechanics - the drop off of net chance to damage [which is the only thing that matters] is reflected by rolling less dice, but a lucky shot or two in a broadside is still possible. Thus in one roll - instead of 2 - you get the same effect.
  6. The simple mechanics allowed me to concentrate on fleet / squadron issues, mainly maneuvering for gunnery advantage.
  7. The IGO-UGO movement by IN works well. You can try to out-think your opponent if you lose IN, but it's not easy, and they get a counter-move to advantage.
Some changes / additions I'd like to try:
  1. Fire torpedoes after gunnery - the reflects the torpedo as a closing weapon, sort of a torpedo run against defensive fire.
  2. Give torpedoes less chance to hit at longer ranges also - realistic and easy.
  3. Try once with RAW hex facing, just in case I'm missing something good about it.
  4. Make ships call their shots, and fire on closest target.
  5. Use simple Quality rolls for anything challenging, like acquiring targets, torpedo runs, any significant turns, breaking up a formation, etc.
  6. Add formation rules for squadrons.
  7. Add a Hit result chart for a few interesting things, like damage that affects: gunnery, torpedoes, steering, morale/Quality, speed, etc.
  8. Add weather, smoke, sea state, shallows, land batteries, and mines.
  9. Remove the Hexes entirely and play using the GQ3 time and distance scales, converting it all into centimeters.
Overall, I recommend these rules as a great place to get started with your friends, especially non-gamers. They can easily be made a bit more historical / realistic, yet they keep you thinking about fleet maneuvers not gunnery. This makes it a lot easier to put in important but often ignore things like weather, sea state, shoals, et al. Plus, it is portable, leaves interesting decisions in the player's hands, and not taxing on the brain.

VERDICT: Full steam ahead!